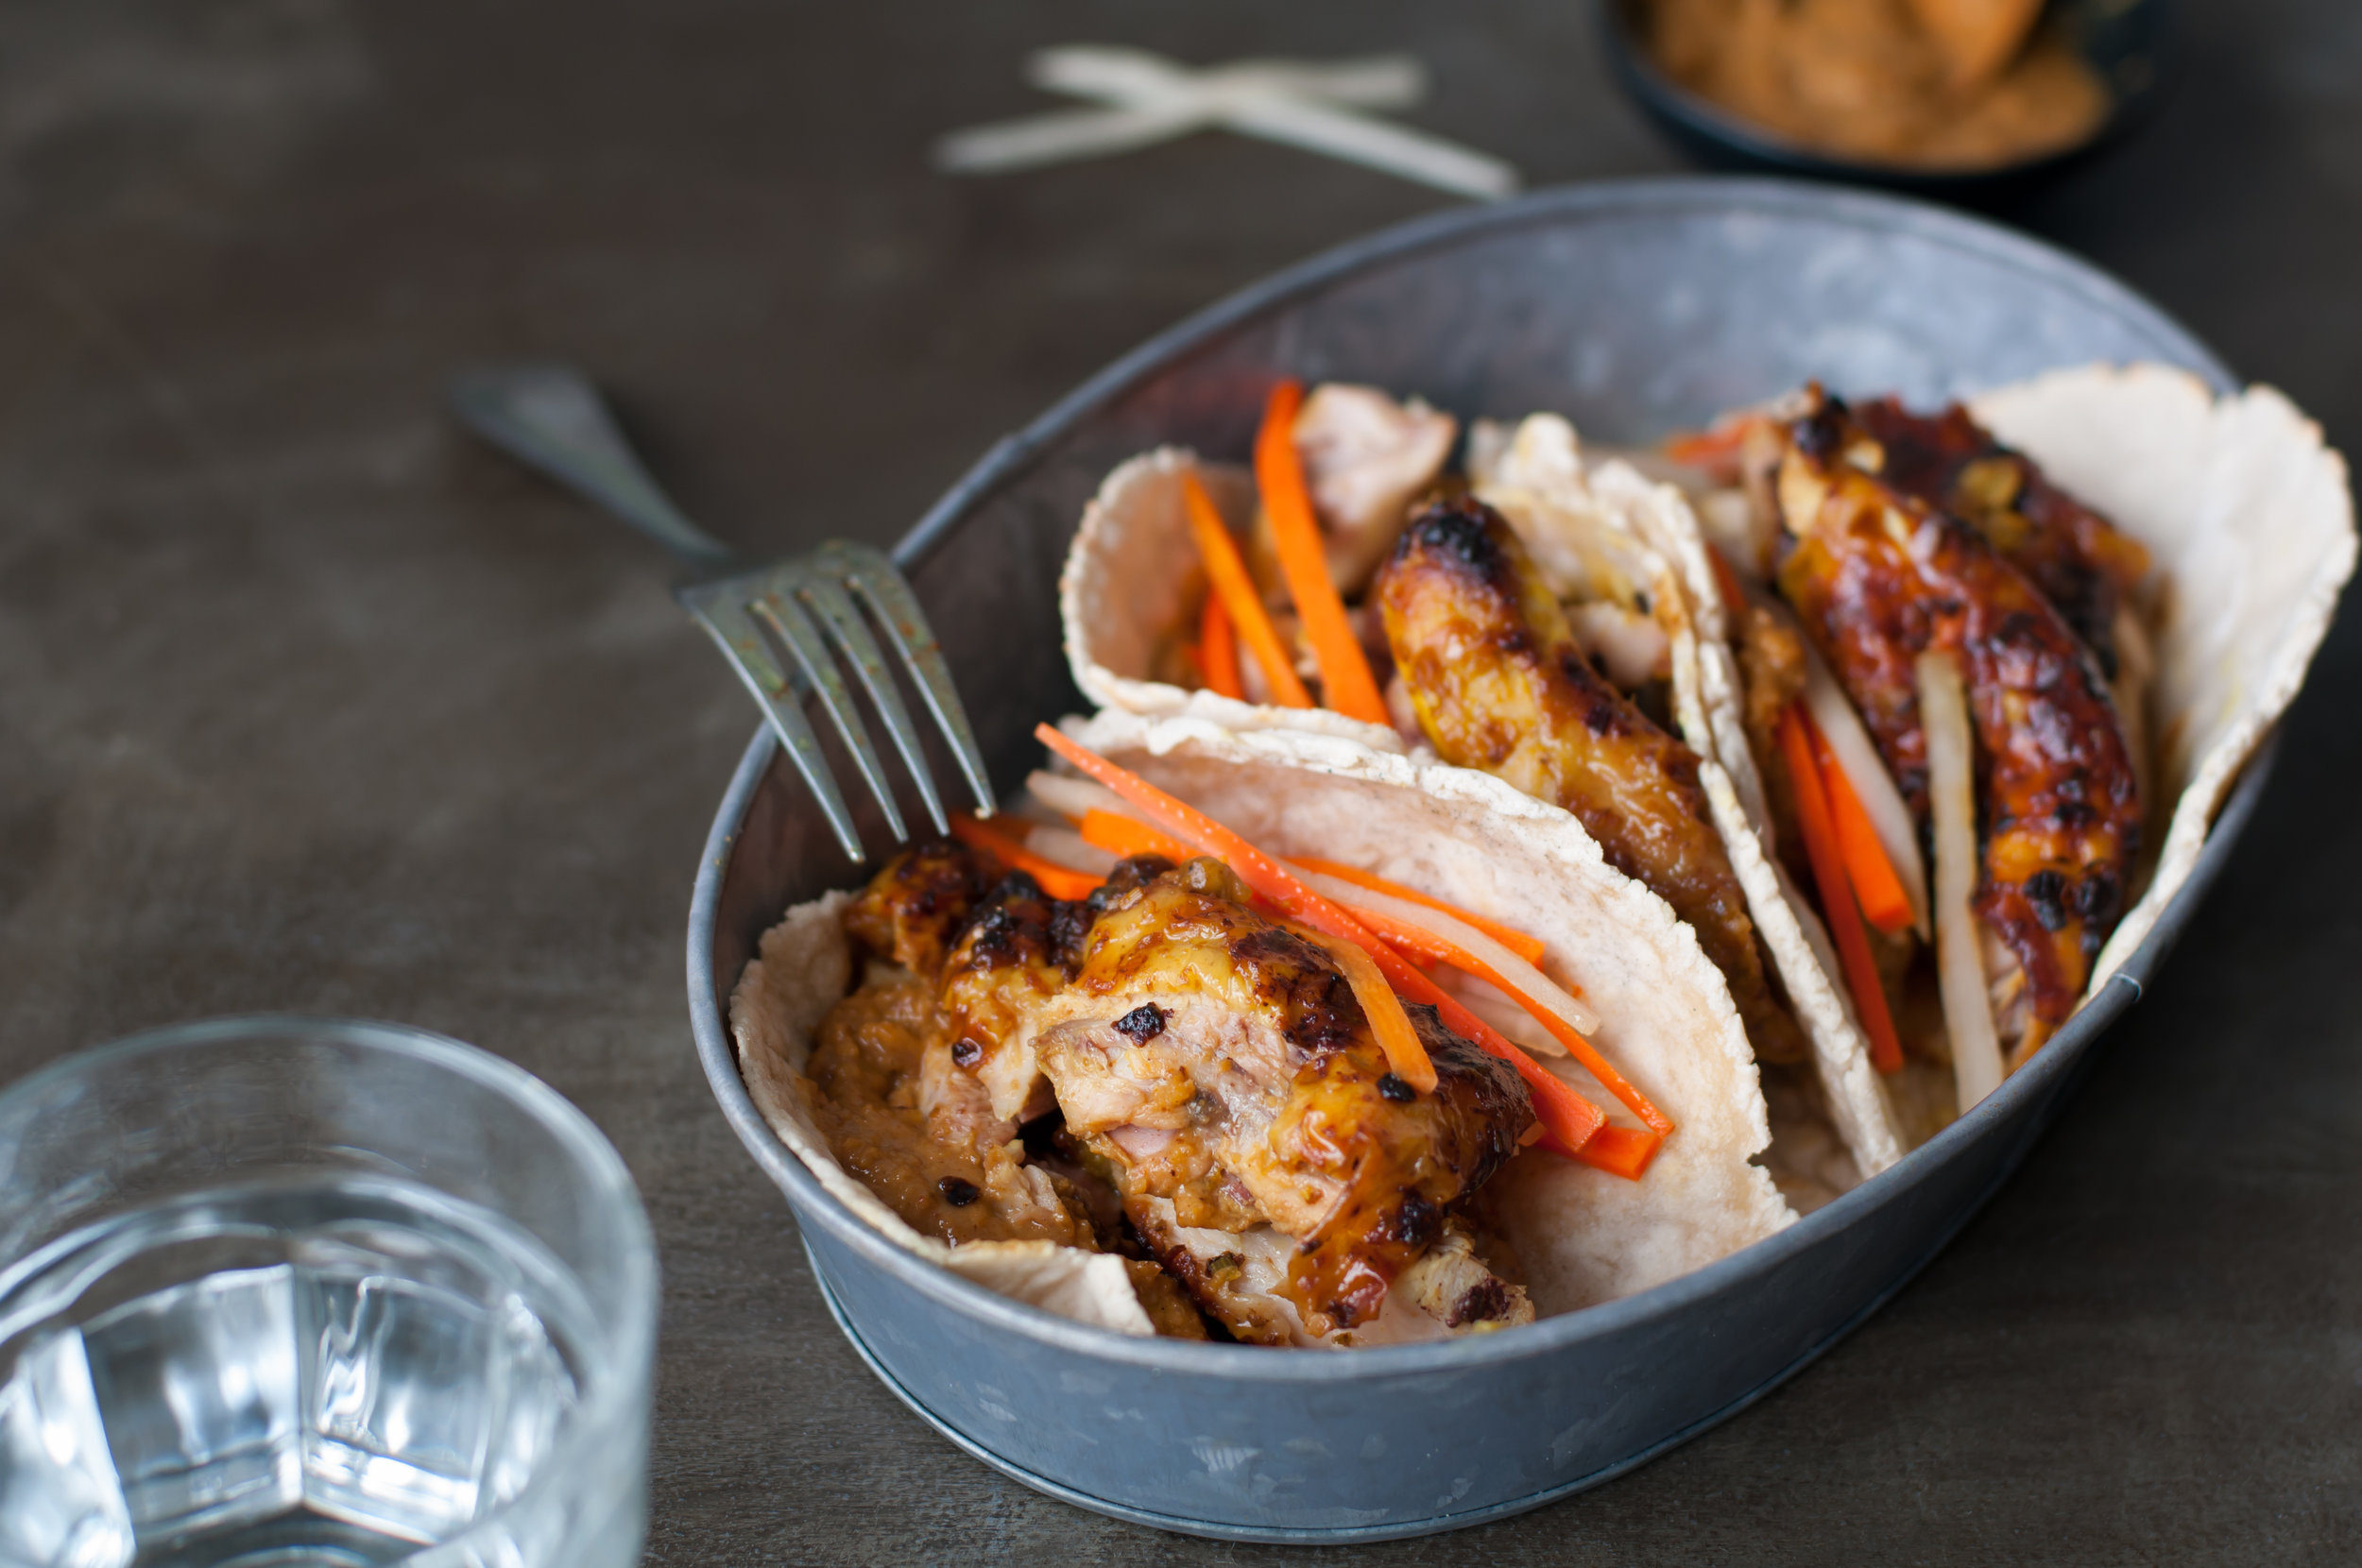
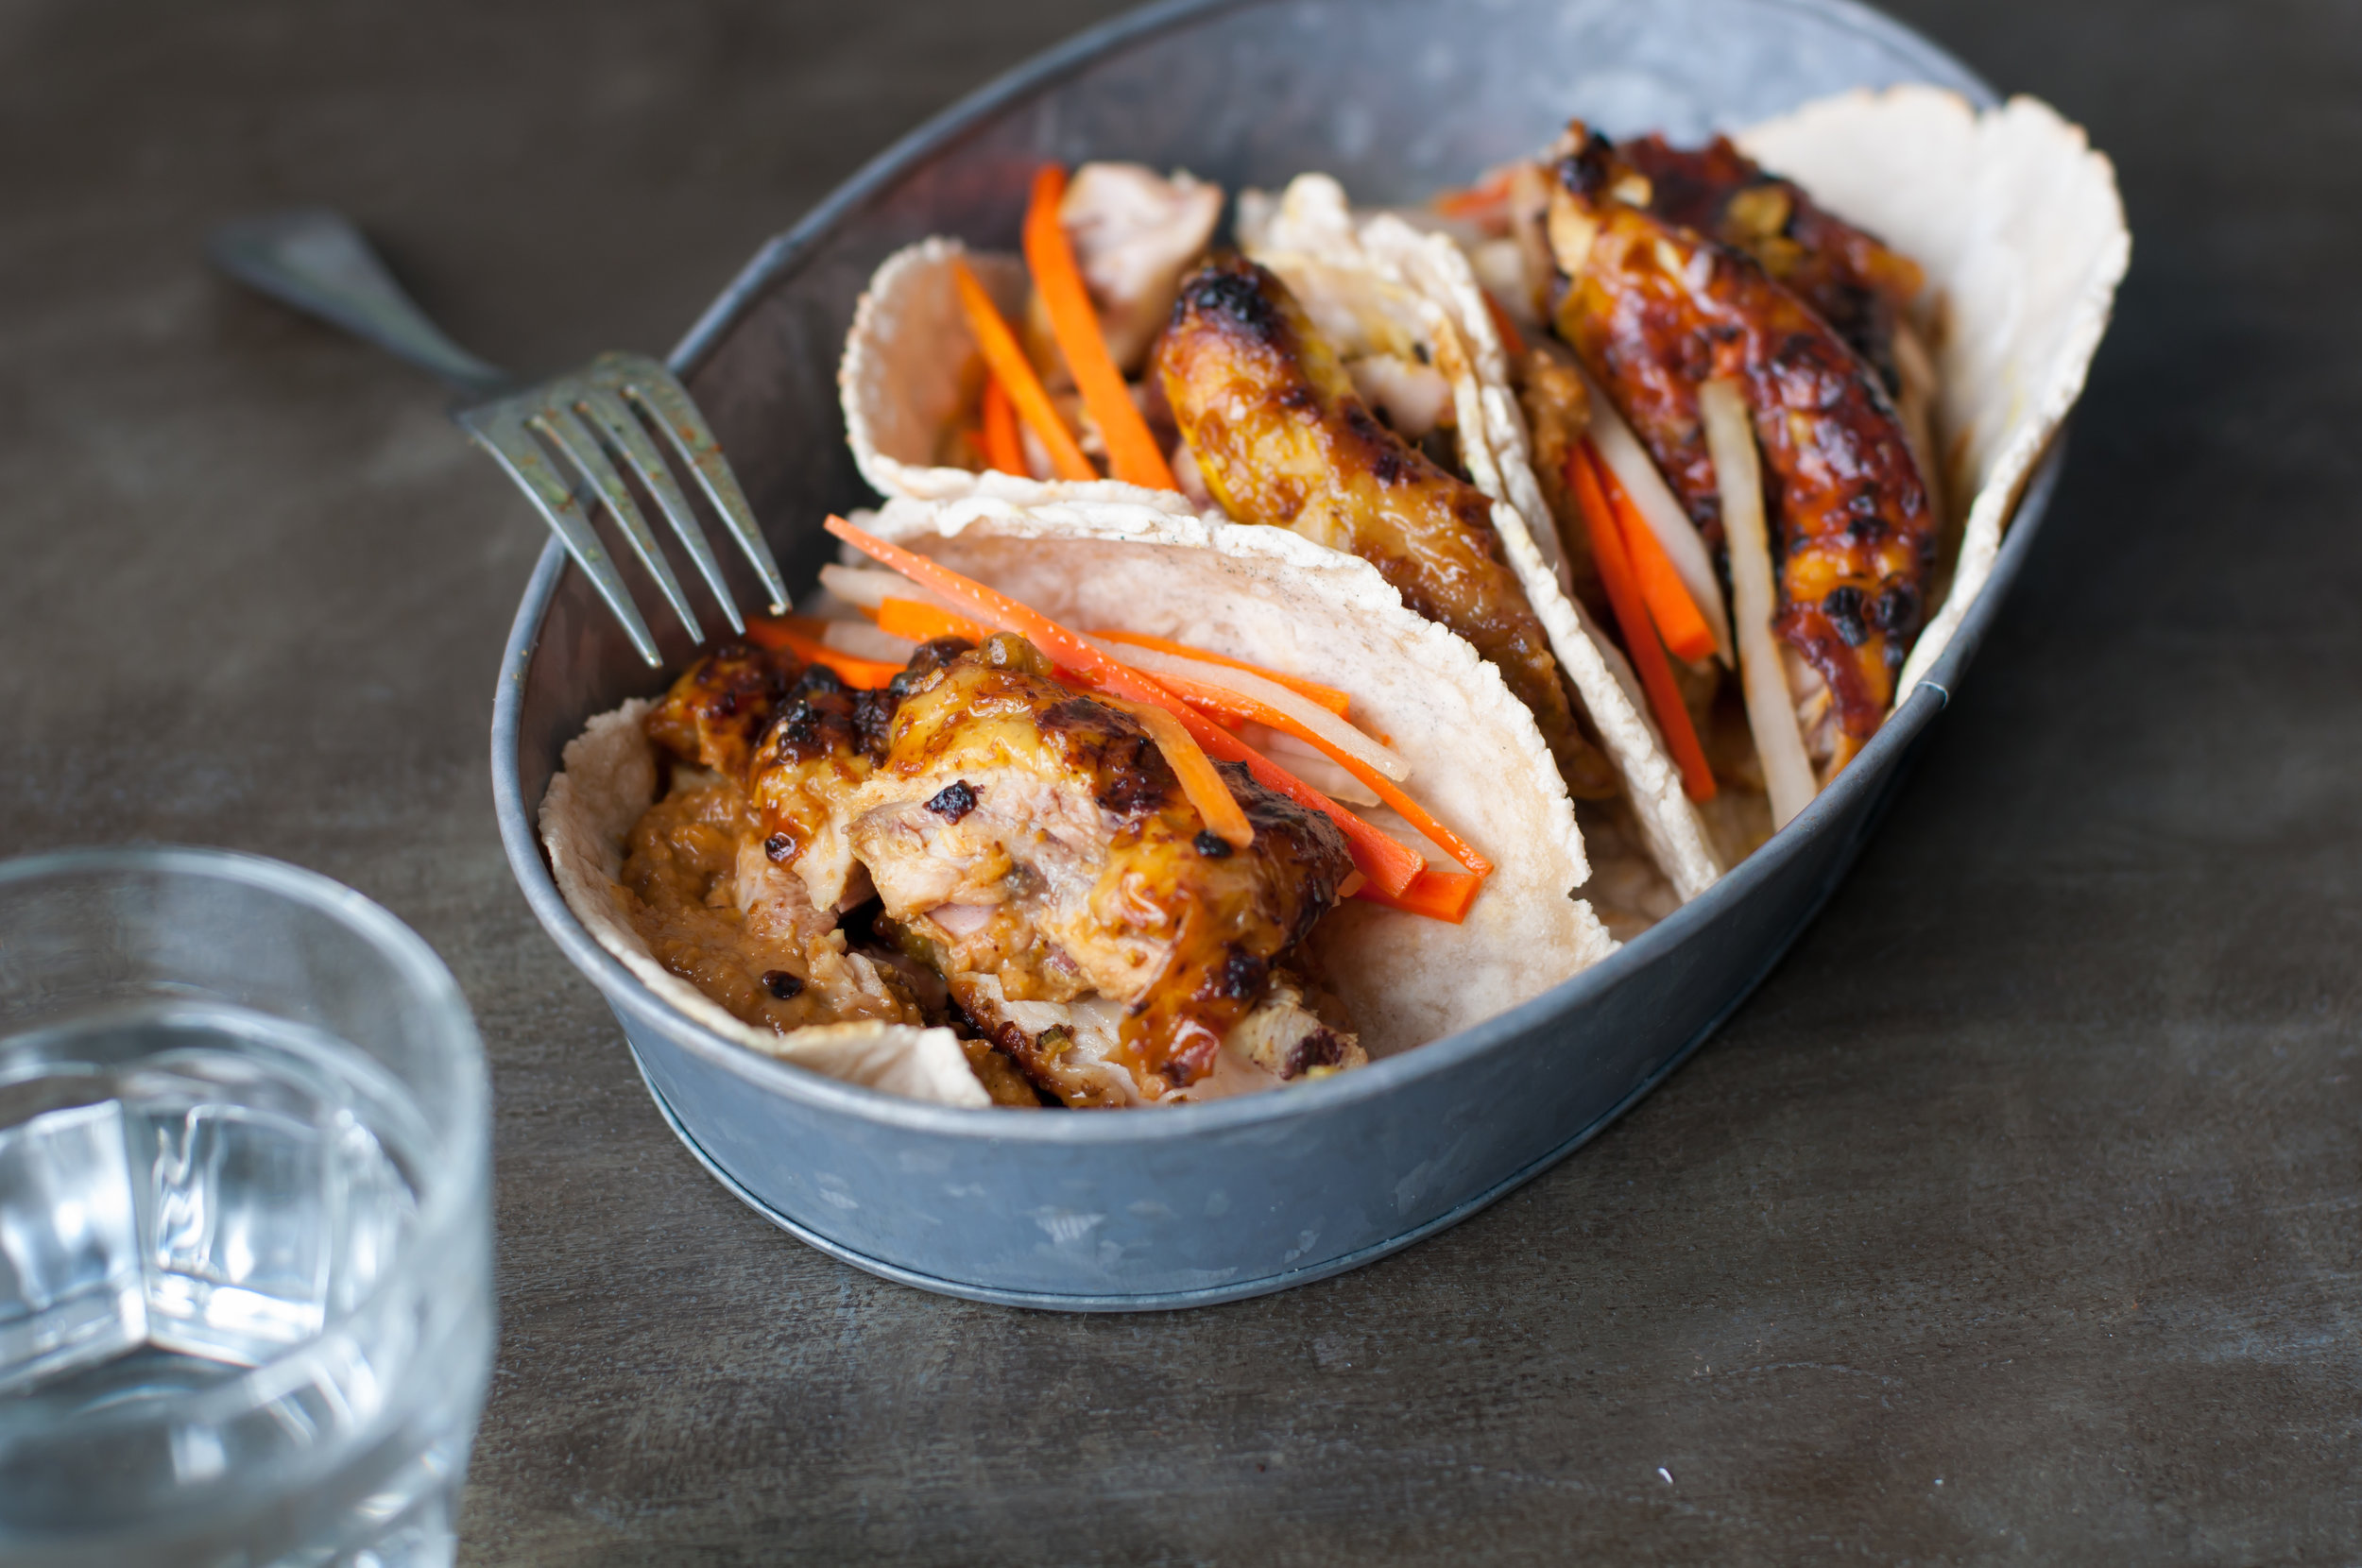
Tamarind Chicken Banh Mi Tacos { gf, dairy free, paleo }


Happy New Year! Ok so maybe it's mid-January already but this is my first blog post of 2017 and it is also the 1-year anniversary of this wee blog so thank you for being here to celebrate it with me!
I'm so happy to kick off the new year with a recipe I'm rather excited about as it uses an amazing and wildly flavorful ingredient that is a relatively recent discovery for me - tamarind. I didn't grow up with tamarind, but I have made up for that lost time by how much I love it now. Are you thinking what even is tamarind anyway?
It's a pod-like fruit that resembles a giant peanut (to me anyway). Google informed me it is grown on trees in Africa and tropical areas like South Asia and Mexico, and that it is used in the cuisines of those regions as well as Middle East, Mediterranean and South East Asia. It's flavor is an intense sweet and tart two-punch. The closest thing I can compare it to in Western culture is prunes, except tamarind's flavor is about 100x more complex and potent, in the best possible way. I've gotten it either in a can (called paste or concentrate) or in a shrink-wrapped package (seedless pulp) from my local Asian grocery store. The pulp needs to be soaked in a touch of hot water first then strained to remove seeds and fibers - whereas the paste is ready to use. Depending on which you get (pulp or paste) the taste and flavor intensity can vary. Make sure to taste your marinade before using, and add more tamarind pulp/paste and salt as needed. I have a preference for the flavor of the seedless pulp I get.
It is an amazing ingredient in marinades, like in this recipe. Its acidity tenderizes the meat while imparting its unique and zingy flavor as it marinades. As an option, you can also reserve a teeny bit of the marinade to use as a serving sauce with the tacos, like I did.
By the way (since I've entitled this a 'bánh mì taco'), bánh mì is a popular Vietnamese sandwich made with grilled or roasted meat (such as chicken or pork) inside long crusty bread, similar to the French baguette except lighter and less chewy. The typical condiments / garnishes I've come across are pickled carrots & white radish, cilantro, mayonnaise and chili peppers but there certainly are a number of other variations. This recipe was loosely inspired by the flavor combination in those deeelicious sandwiches.
Since my daughter has a grain restriction at the moment, traditional Bánh mì bread was not an option for us. Instead, I made grain-free tortillas using Otto's cassava flour. Cassava flour is dried and grounded up yuca, a root vegetable also used to make tapioca (only processed differently). Cassava flour tortillas are pliable and have a slight chewiness which we all rather enjoy! For convenience, I've included below the cassava tortilla recipe which is found on the back of Otto's bag, but scaled it up to make 8 larger tortillas. Obviously, you can make or purchase regular wheat or corn tortilla instead, if grain intolerance is not an issue for you.
The pickled carrots and white radish (aka 'do chua' in Vietnamese) are essential to the bánh mì experience! As I always say, if given a choice and the time, I prefer to 'lacto-ferment' over 'pickling' using vinegar. The lacto-fermentation process requires just salt + water + time! It creates the tangy flavors without the use of any vinegar. The creation of healthy bacteria (probiotic) in the process is beneficial to your gut health and immunity, making it so worth the while. Here is a link to a lacto-fermented 'do chua'. It does, however, require about a week. So if you don't have a week, you can follow a vinegar method which makes pickles you can eat right away or in fewer days. For your convenience, I have linked for you the recipe for lacto-fermented method here OR quick pickled method here.
MAKE AHEAD:
The chicken should be marinaded at least a few hours to tenderize and absorb flavor, even better if you have that done the night before and let it sit overnight in the fridge.
Pickling the 'carrots and white radish ('do chua') - see my head notes about lacto-fermentation versus quick pickle methods. Do this on a weekend and have it on hand - it keeps in refrigerated in an air-tight container for a few months!
Tamarind Chicken Banh Mi Tacos
Recipe serves 4.
INGREDIENTS
For the marinaded chicken:
2.5 lbs chicken thighs (bone-in, skin-on)
1 lemongrass stalk, bottom 4" portion only, outer leaves removed if tough and rough-chopped into 1 cm pieces
3 garlic cloves, peeled
1 shallot, peeled
2 tbsp tamarind paste or concentrate (see headnote if using tamarind 'pulp')
1 tsp ground turmeric
3 tsp kosher salt, or to taste
1/2 C coconut milk (stirred well after opening the can)
For the cassava flour tortillas (makes 8 tortillas):
2 1/4 C Otto's cassava flour
3/4 tsp kosher salt
6 tbsp olive oil
1 C warm water, or a bit MORE OR LESS to make a dough that binds together when rolled with your hands
For serving:
Pickled carrots and white radish ('do chua') - see recipe for lacto-fermented method here OR quicker pickle method (not paleo) here
Cilantro leaves (authentic to bánh mì's but I omitted because I'm not a fan)
Toasted peanuts (1-2 tbsp) finely chopped to make a sauce using some reserved marinade
METHOD
1. Place chicken pieces in a plastic zip-top bag, on top of a shallow dish to catch any leaks.
2. Put the lemongrass pieces, garlic and shallot into a small food processor and pulse until it forms a paste. If you don't have a small-sized food processor, you can alternatively pulverize the ingredients using a pestle and mortar (in which case I suggest chopping them into smaller pieces by knife first to make it easier on yourself). Some small lumps is no big deal. Add the tamarind paste and pulse further until well integrated. Add the ground turmeric, salt and coconut milk and mix well. Taste the marinade! Make sure it is salty enough (it should taste quite salty). As mentioned above, one thing I've learned is tamarind pulp / paste can vary quite a bit on their flavor intensity.
{ Optional serving sauce: if desired, reserve about 1/3C of the marinade to make into a sauce by mixing it with ~1-2 tbsp of finely-chopped toasted peanuts. Set it aside. }
Pour the (remaining) marinade into the bag holding the chicken. Using your hands on the outside of the bag, move the chicken pieces around to coat evenly. Remove as much air as possible, seal the bag and place it in the fridge (still on top of the shallow dish) for minimum 2-3 hours, or preferably overnight.
3. Preheat oven to 400f. Remove chicken from the bag and place them on parchment-lined baking sheets, leaving a bit of space between them for even cooking. Roast for 35-40 minutes, or until cooked through. In my oven, bone-in thighs are done perfectly in exactly 36 minutes. But every oven is way different, so check by piercing the thickest part of a thigh with a skewer or sharp knife -- juices should run clear.
4. Make cassava tortillas - SKIP TO STEP 5 IF YOU ARE NOT MAKING THE CASSAVA TORTILLAS: While the chicken is roasting in the oven, make the cassava tortillas. Whisk together the flour and salt. Add the oil and warm water until a nice dough begins to form. If you live in a drier climate like me, you will likely need to splash a bit more warm water to get the right consistency. The dough should not be dry or too wet and sticky. Knead the dough until smooth. Divide the dough evenly into 8 equal-sized balls by first dividing into 2 pieces, then divide each of those two balls into another 2 pieces (now you have 4) and repeat once more until you have 8. Roll each dough ball between two pieces of parchment paper (or use a tortilla press if you have one) until thin. Heat a cast iron or nonstick skillet over medium high heat. Once properly heated, place tortilla on the skillet. Wait for the air bubbles to form (approx. 1 minute) and then flip. Each side should have some slightly brown spots. Stack the tortillas inside a clean kitchen towel, covered, to keep warm until ready to eat.
5. Once the chicken is done, remove from oven and allow to cool until you can handle it. Using your fingers or fork, pull large pieces of meat off the bone. Do your best to keep the flavorful skin attached to the pieces of meat so you get a bit of both in every bite. Serve in warm tortillas, with the pickled 'do chua' and cilantro if you wanna be all authentic and stuff - personally I'm not a cilantro fan so I've omitted it even though I know this will make all kinds of bánh mì lovers hate on me. With cilantro or without, these tacos are still wildly flavorful and what you need to make for dinner!

Hi, I’m Sonia
I share recipes inspired by my food cravings and what I make for my family. My role as a working mom of two girls, my life in Toronto Canada and my background as a Chinese immigrant from Hong Kong all inform the things I love, crave and create. This means an emphasis on wholesome recipes that are approachable for busy weeknights and fun recipes to make on weekends and for friends!
homemade food to nourish and indulge …
More about Sonia >