How to make Dumpling Wrappers from Scratch
Homemade dumplings are a labor of love! And there is nothing else quite like them. People often express surprise to me that the dough for dumpling wrappers is simply made with all purpose flour and water. Well, to be clear, homemade wrappers are but most commercially-sold dumpling wrappers also have an added preservative to extend shelf-life. When I realized this, I learned how to make my own dumpling wrappers.

That being said, I’m not throwing shade at store-bought dumpling wrappers! They are a super convenient option, especially when short on time or when making hundreds of dumplings at a time — which we do! Many families use store-bought wrappers because of this. Making dumping wrappers from scratch is very similar to making fresh pasta from scratch. You can master it with a little practice and the payoff is very satisfying ☺️

Be sure to check out the PHOTOS and VIDEO TUTORIALS in this post.
DUMPLING FILLINGS: I have my two favourite filling recipes on the blog, a plant based Chinese Vegetable Dumplings filling and an authentic Shanghai Wonton / Dumpling filling recipe. I’m very particular about what filling is worth the time and effort of homemade dumplings and these two are it for me!
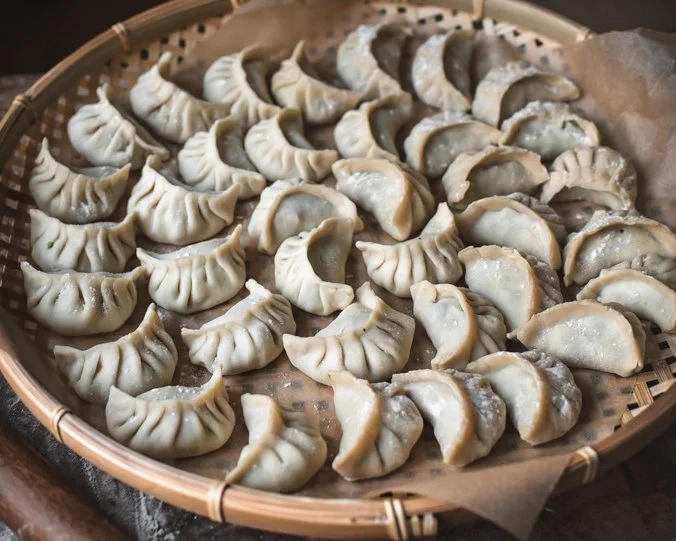
HOW TO FOLD DUMPLINGS, CLASSIC PLEATS: I’ve linked a video tutorial from my IG at the end of this post showing how to fold dumplings using your homemade wrappers into the classic pleat style shown in the photo above. There are also photo instructions in my Chinese Vegetable Dumplings post you might find useful.
As always, I try to be thorough in my instructions but if you have any questions I haven’t answered, drop it in comments below and I’ll be sure to respond :)
Eat well and be well X

How to make Dumpling Wrappers from scratch
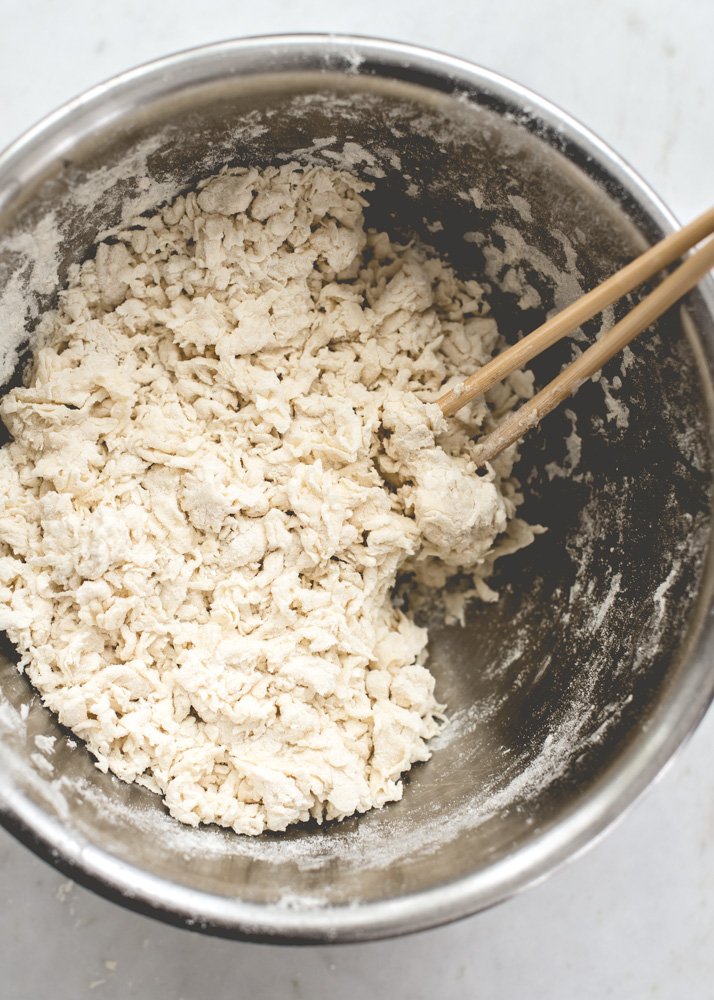
Place a wet kitchen towel or paper towel underneath mixing bowl to keep it from moving around. Drizzle water into measured amount of flour while stirring.
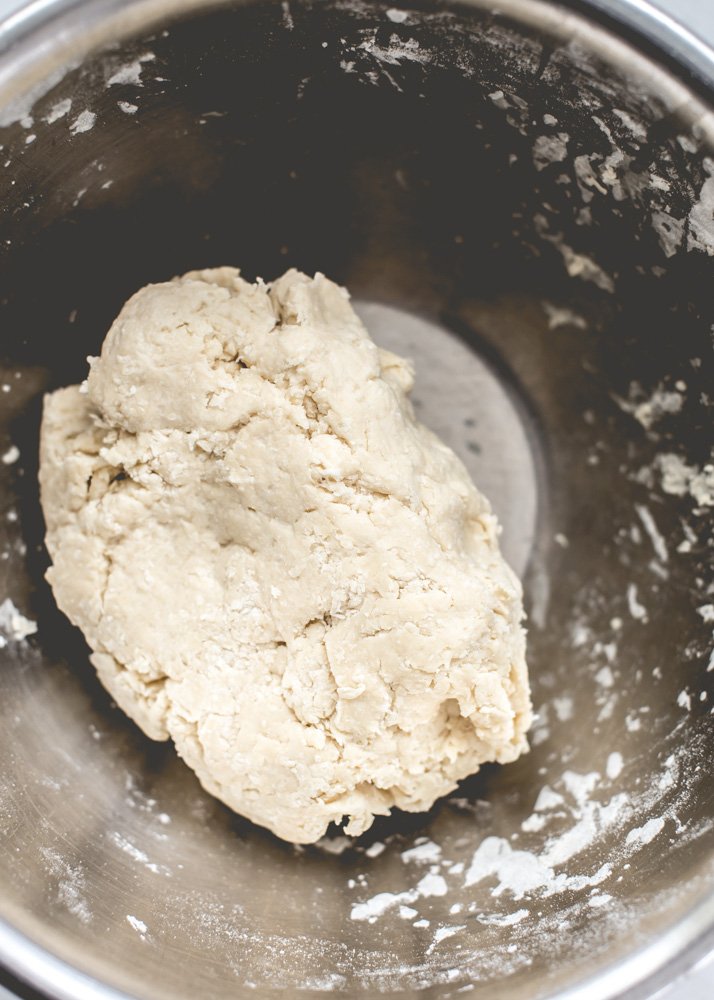
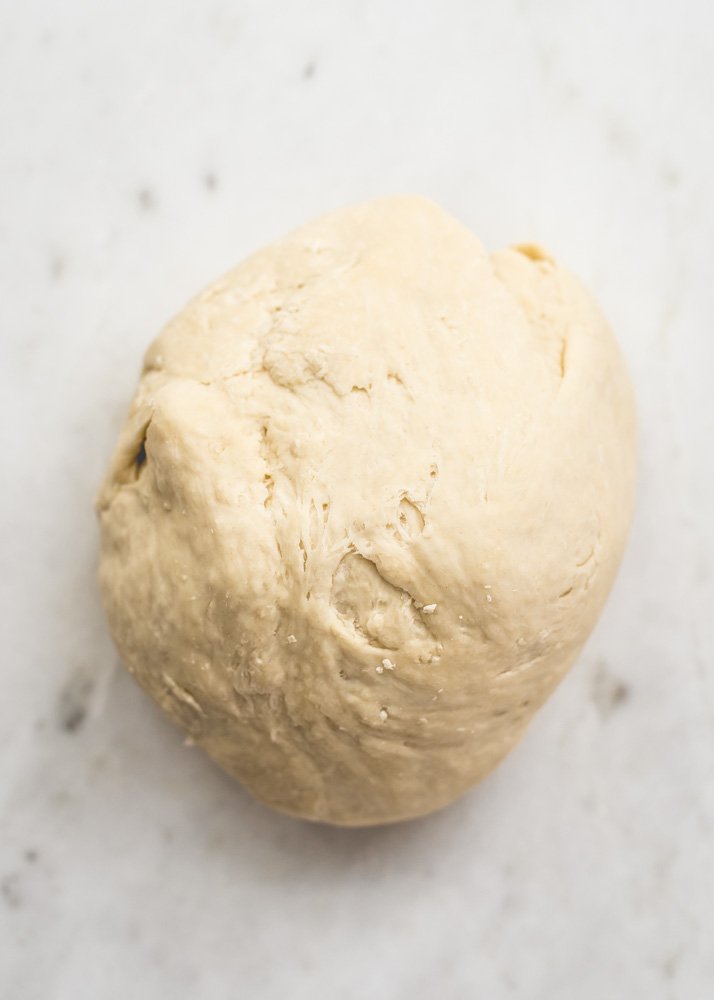
Once the water and flour are mixed, it should look scraggly like the first photo (upper left). Start kneading the dough with your hands, sprinkling teeny bits of water over very dry areas as needed - see second photo (upper right). Knead for 8-10 minutes until very smooth. The third photo shows halfway through kneading at about 5 minutes (lower left). After the full 10 minutes of kneading, shape the dough into a ball and allow it to rest 15 minutes under a tea towel. Knead again for 3 more minutes. The fourth photo is how it looks before covering the dough for the 1-hour rest (lower right).
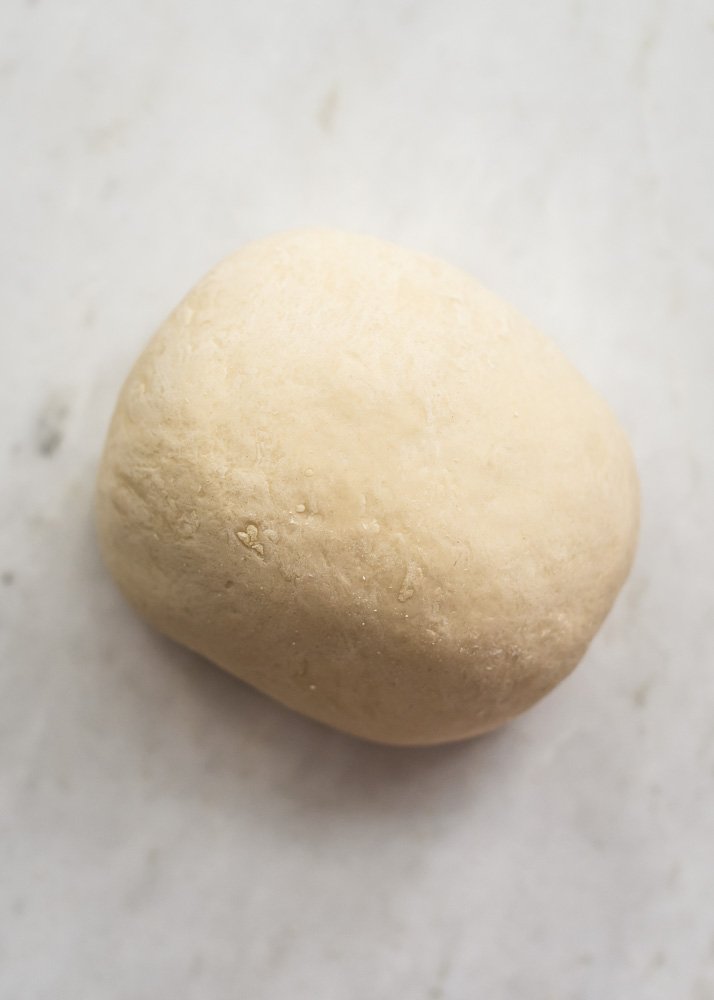
Drizzle a tiny bit of oil into the mixing bowl and roll the dough ball around to lightly coat all over. Cover with tea towel again and this time, rest for at least 1 hour or up to overnight (use food wrap to wrap tightly if resting overnight). The longer the dough rests, the softer it gets. Softer dough is easier to handle but you also want the dough to retain some chewiness. Photo below shows the dough after resting 1 hour. At this stage, it is ready to use for making dumpling wrappers.

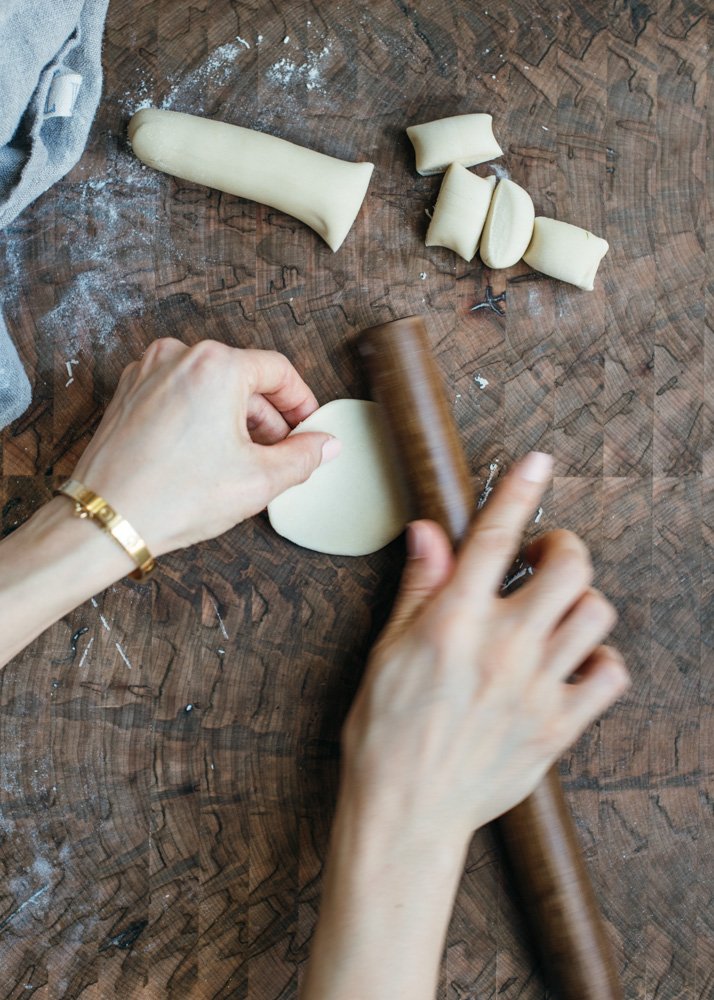
How to roll out standard round wrappers
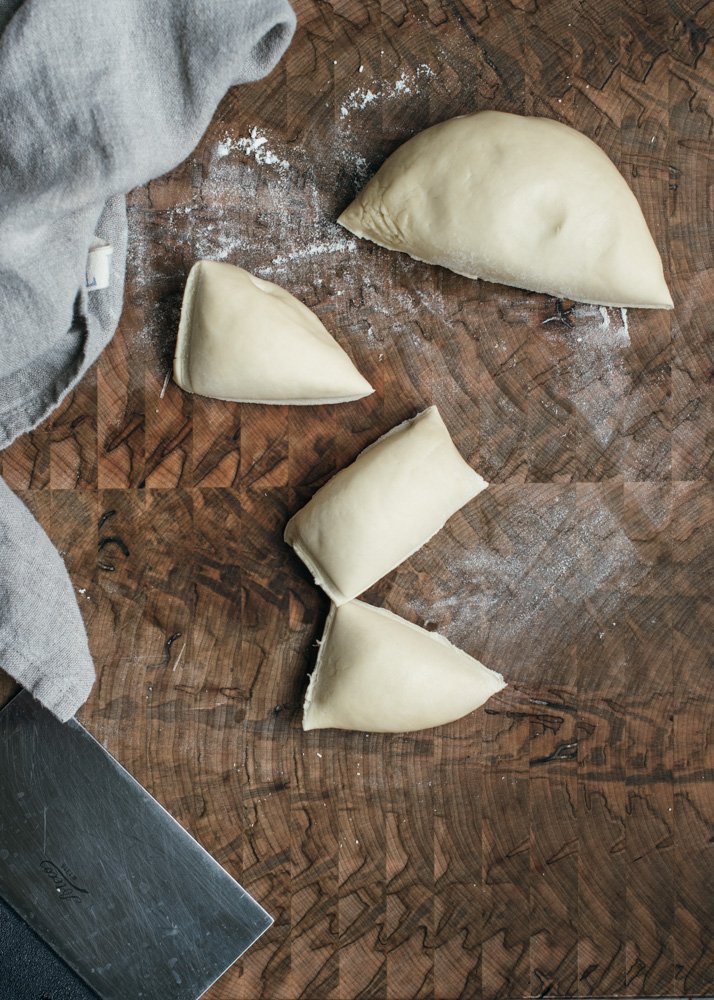
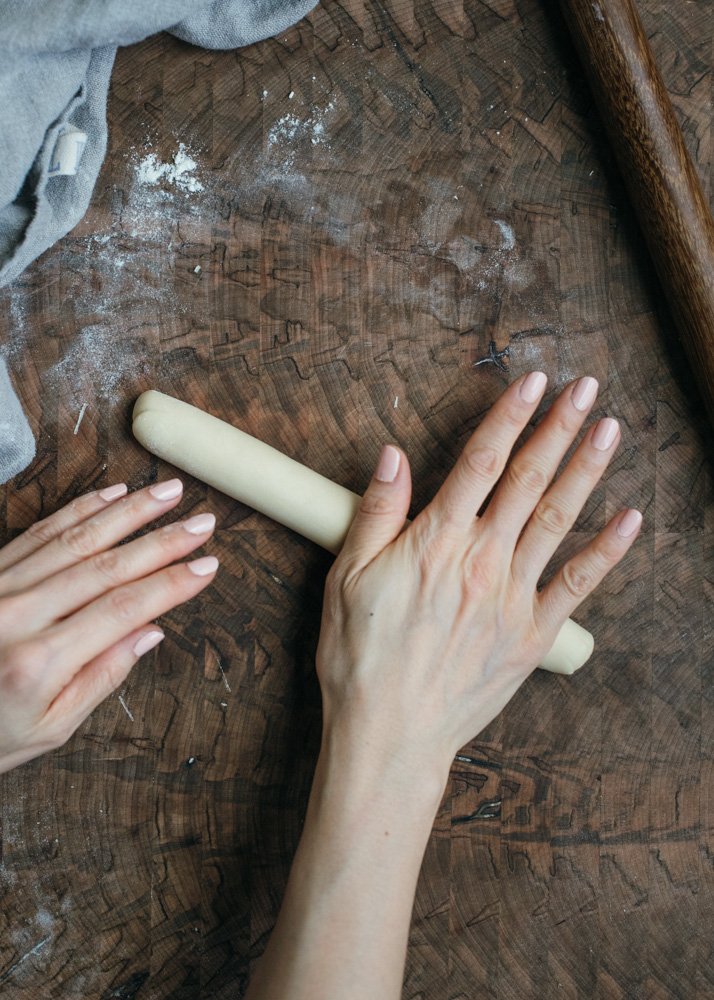
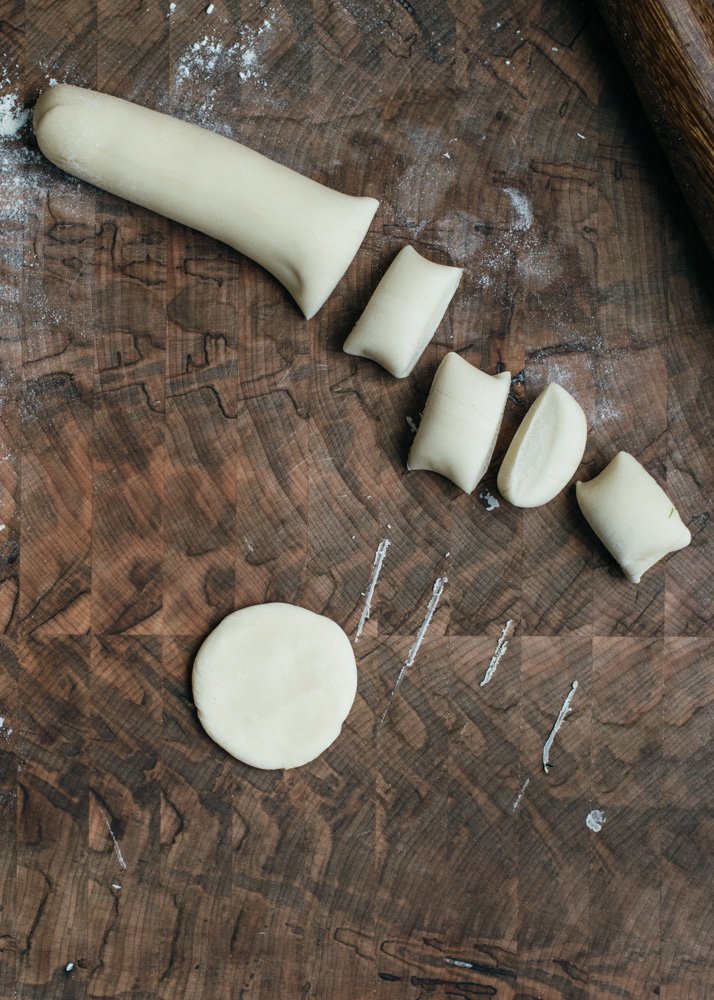
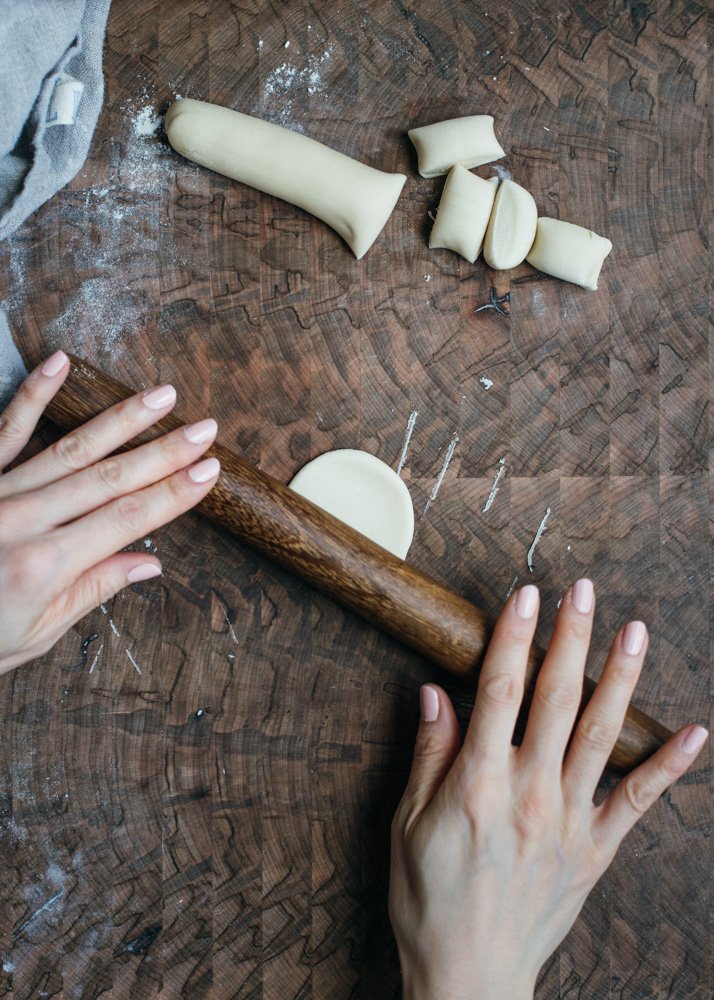
Cut the dough ball into 6-8 more manageable pieces. Take one cut piece (re-covering the rest under the tea towel) and roll it with your hands into a long rope about 1” in diameter. Cut into 1 tbsp sized pieces, about 10g each. Dust pieces with flour and also your work surface. With cut-side facing up, flatten one piece of dough with the palm of your hand. Dust a small rolling pin to roll the dough into circles approximately 3½” in diameter, with the edges thinner than the centre of the wrapper. We do this because the edges are essentially doubled-up once pleated. A super-thick edge is not desirable. This is how I roll my wrappers:
(1) Give the dough a few light rolls back and forth, stop, rotate, roll. This is an easy way to start while maintaining a circular shape.
(2) Start rolling like pie dough i.e. rolling outward from the center, stop, rotate 45 degrees after each pass, and repeat until the wrapper is about 80% of the way there (full size being ~3 ½”).
(3) For the final 20%, be deliberate about rolling just the edges alone, in repeated outward motions with the rolling pin in one hand, while the other hand rotates the dough (at the same time).
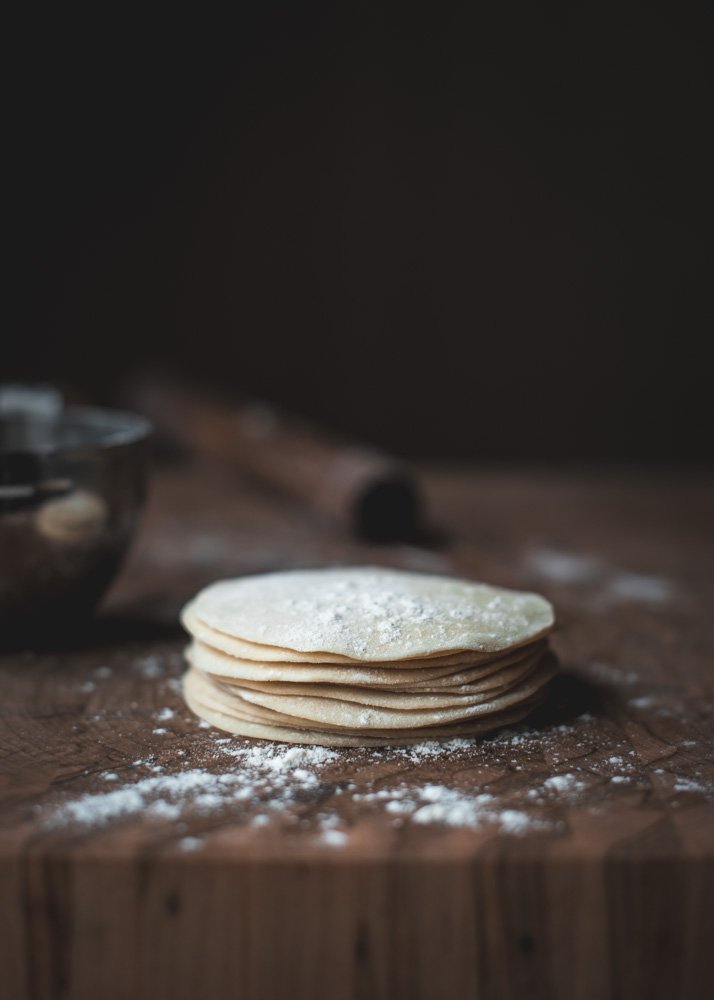
Don’t worry, it needs not be perfectly circular. Once you pleat the dumpling, a little wonkiness won’t be noticeable.
There you go. Now you’re ready to fill and pleat!
You might find this video tutorial from my IG helpful too!
Looking for dumpling fillings? Check out my favourites:
How To Make Dumpling Wrappers From Scratch
Makes approximately 2 lbs of dough or 7-dozen dumpling wrappers. This recipe can be scaled up for more dumplings or down for fewer. I personally love bigger batches when it comes to dumplings because dumplings keep well in the freezer for 1-2 months. Wrappers don’t keep that well though so I recommend making what you need based on the amount of filling you have.
INGREDIENTS
4 ½ C (635g) All-purpose flour (un-sifted, just scoop and level off OR better yet, weigh on kitchen scale)
1 ⅓ C (315ml) Tepid water, plus 2 to 4 tablespoons as needed
METHOD
Place the flour in a large mixing bowl. Put bowl on top of a moist kitchen towel to help it stay in place while you stir. Slowly drizzle the 315ml of water in a steady stream while mixing with your hand or pair of chopsticks. Once incorporated, the dough should still look a bit scraggly with some loose, dry bits throughout. Start kneading the dough with your hands, only sprinkling teeny bits of water over very dry areas as needed. Knead for 8-10 minutes until very smooth. Shape the dough into a ball and allow to rest 15 minutes under a tea towel. Knead again for 3 minutes. Drizzle a tiny bit of oil into the mixing bowl and roll the dough ball around to lightly coat all over. Cover with tea towel again and this time, rest for at least 1 hour or up to overnight (use food wrap to wrap tightly if resting overnight). The longer the dough rests, the softer it gets. Softer dough is easier to handle but you also want the dough to retain some chewiness. You can make your filling while it rests. I have my two favourite filling recipes on the blog, this (plant based) Chinese Vegetable Dumplings filling and this authentic Shanghai Wonton / Dumpling filling recipe. I’m very particular about what filling is worth the time and effort of homemade dumplings and these two are it for me!
Once your dough has rested, set up your wrapping station. Line two baking sheets with parchment paper (you can dust it with a bit of flour too) to hold the completed dumplings. Set out a portion of filling and a small dish of cold tap water for sealing edges. Have some flour on hand for dusting as you roll out dough. A kitchen scale is useful to weigh out dough pieces to ensure you end up with same-sized wrappers but don’t worry if you don’t have one, you can also guestimate. Tip: Roll wrappers and fill and fold them in small batches, as the rolled-out wrappers dry out quickly. I like to work with 10 at a time, but start with 5 at a time if this is your first time.
Cut the dough ball into 6-8 more manageable pieces and keep them well covered under the tea towel or plastic wrap as you work. Take one piece of dough and roll with your hands into a long rope about 1” in diameter. Cut into 1 tbsp sized pieces, about 10g each. Dust the cut pieces and work surface lightly with flour. Take one piece and place it cut-side facing up. Use fingertips to gently shape it as round as you can – this simple step helps yield a round wrapper once you start rolling. Flatten with the palm of your hand. Dust a small rolling pin and roll the dough into a circle approximately 3½” in diameter, with edges thinner than the centre of the wrapper. There are different ways to roll. Use a method that feels comfortable to you. I share my technique below.
HOW TO ROLL OUT DUMPLING WRAPPERS:
As mentioned, it is important to roll the edges thinner than the center because the edges are essentially doubled-up once pleated. A super-thick edge is not desirable. This is how I roll my wrappers:
(1) Give the dough a few light rolls back and forth, stop, rotate, roll. This is an easy way to start while maintaining a circular shape.
(2) Start rolling like pie dough i.e. rolling outward from the center, stop, rotate 45 degrees after each pass, and repeat until the wrapper is about 80% of the way there (full size being ~3 ½”).
(3) For the final 20%, be deliberate about rolling just the edges alone, in repeated outward motions with the rolling pin in one hand, while the other hand rotates the dough (at the same time).
Don’t worry, it needs not be perfectly circular. Once you pleat the dumpling, a little wonkiness won’t be noticeable. And practice makes perfect! Once you’ve rolled out 3-5, fill and fold into a dumpling. Rolled out wrappers tend to dry out and become more difficult to pleat, hence, I recommend working in batches of 5 wrappers at a time, until you get faster.
Wrap the dumpling however your wish – there are a myriad of styles! The quickest and simplest way is to fold it in half, into a half moon. My personal go-to is the symmetrical pleat, as pictured in this post.
Cook dumplings according to recipe directions.


Hi, I’m Sonia
I share recipes inspired by my food cravings and what I make for my family. My role as a working mom of two girls, my life in Toronto Canada and my background as a Chinese immigrant from Hong Kong all inform the things I love, crave and create. This means an emphasis on wholesome recipes that are approachable for busy weeknights and fun recipes to make on weekends and for friends!
homemade food to nourish and indulge …
More about Sonia >