Chinese Vegetable Dumplings (Jiaozi / 餃子) Recipe with Step-By-Step Photos
RECIPE⇣ HOW-TO VIDEO: DUMPLING WRAPPER⇣ HOW-TO PHOTO GUIDE: CLASSIC PLEATS⇣
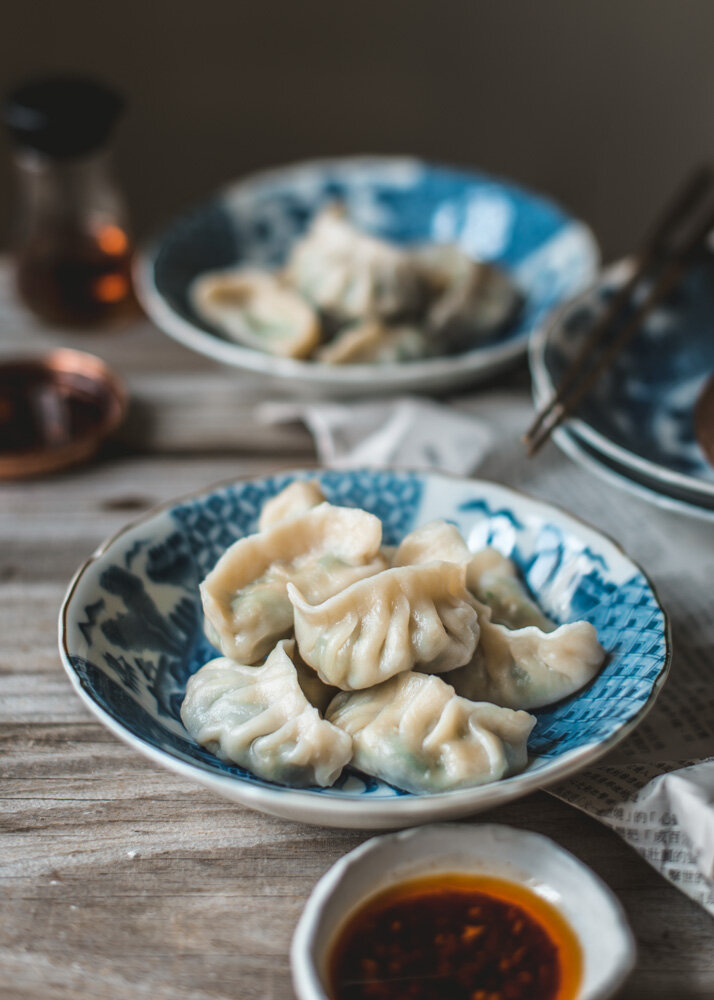
Delicious homemade Chinese Vegetable Dumplings (Jiaozi / 餃子) filled with sautéed snow pea leaves, Chinese chives, shiitake mushrooms and tofu. Recipe includes homemade wrappers but you can also use store bought wrappers with this filling.
I don’t even know who I am anymore. This dumpling recipe is challenging all my fundamental, life-long (dumpling) beliefs.

I grew up eating and making lots and lots of a classic Shanghai style dumpling filled with bok choy, ground pork and sometimes shrimp. In fact, the very first recipe I shared on this blog was my grandmother’s SHANGHAI WONTONS/DUMPLINGS recipe. I considered that recipe superior to all other dumplings. Hands down, by a landslide, without a shred of doubt, forever and ever, amen. Veggie dumplings? Pssssssft. Not even a contender. Why bother? Never had a veggie dumpling that I loved and was worth the trouble. Until now…

I declared these Chinese Vegetable Dumplings equally as delicious as my beloved bok-choy-and-pork Shanghai dumplings. With the added virtue of being meatless and plant-based. My daughters gobbled these up the three times I made them in the last two weeks (an upside of preparing for this blog post). My meat-loving husband conceded that these were very tasty “for veggie dumplings” and that he would be fully happy to eat a meal of “mostly these veggie dumplings with a few of the meat ones” lol.
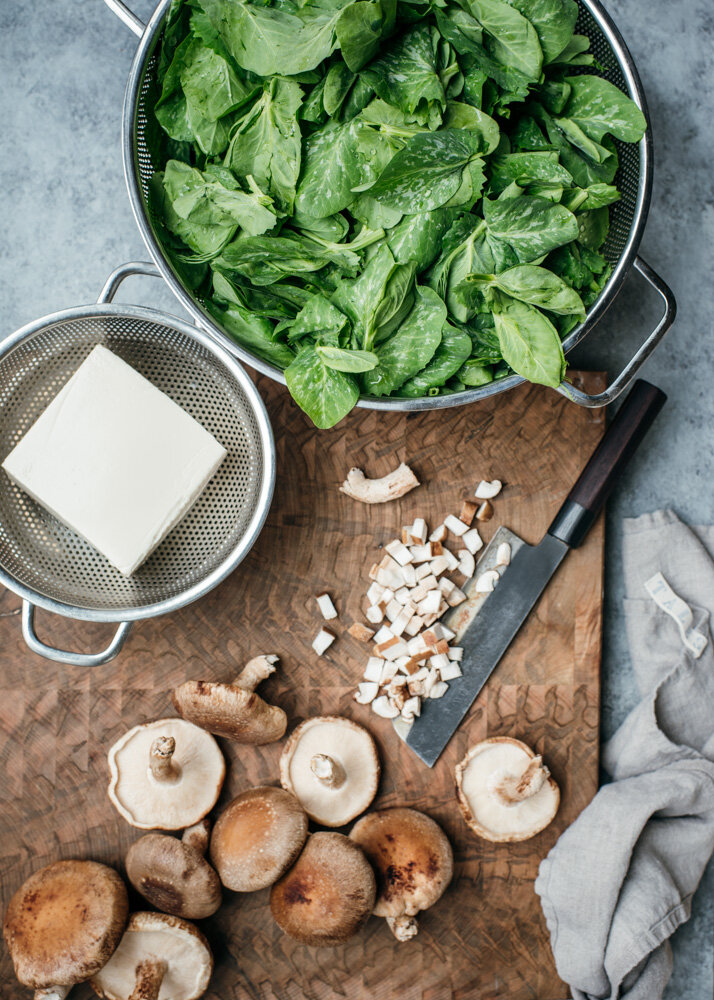
This is why I am so eager to share this recipe with you! I’m particularly excited because this recipe is unlike any of the other vegetarian dumplings I found on the internet, filling-wise. Most vegetable dumpling recipes I came across are filled with some combination of cabbage, carrots, mushrooms, and tofu. Don’t get me wrong - I love all of those ingredients a lot. But for dumplings, I definitely prefer the more vegetal flavour of dark leafy greens, over the sweetness of carrots or taste of cabbage (not least Napa cabbage, which despite being one of my fav asian veggies is, again, too sweet for my dumplings). Other snow pea leaves dumplings typically contained meat or shrimp. In this plant-based dumpling recipe, the combination of sautéed snow pea leaves, Chinese chives and shiitake mushrooms is so tasty together that very little else is needed besides some well-squeezed, extra-firm tofu to give the filling some body and substance, plus the simple seasonings of tamari, sesame oil, white pepper powder and kosher salt.

SNOW PEA LEAVES (AND SUBSTITUTES)
Snow pea leaves are also known as snow pea tips or snow pea sprouts. They are one of the best Chinese greens around, with a mild but lovely vegetal flavour and tender leaves and stalks. It is a bit on the pricier end as far as Chinese greens go. I get mine from a Korean supermarket for $6/lb, apparently grown in Mexico. Chinese supermarkets sell it a bit cheaper but I’ve noticed there tends to be more tough stalks that need to be pulled off, so, you kinda get what you pay for. Even at a premium, snow pea leaves are well-loved by Chinese and other East Asian people. My husband and girls would eat piles and piles of it, simply sautéed with garlic. Here in North America, I still find them fairly unrecognized and under-utilized outside of Chinese restaurants and asian households. If you can find it at your local Asian supermarket, definitely grab some for this recipe! If you are unable to get snow pea leaves, substitute (same weight) with another dark leafy Chinese green veggie such as baby bok choy, which is fairly accessible these days even at conventional grocery stores. (See the image under Method, “prepare the filling” section of this blog post for a look at what raw Snow Pea Leaves look like.)

CHINESE CHIVES (AND SUBSTITUTES)
Chinese chives is another asian vegetable (pictured above). They are different from the chives you get in the herb section used for garnish and finishing dishes. Chinese chives have long, tender blades that is green the entire length with slightly darker tips. Their flavour is leek-y and a bit garlicky, often compared with ramps. They add such a delicious and unique taste and aroma to the dumpling filling. Chinese chives are commonly available at asian supermarkets (I grab mine at the same Korean one where I get the snow pea leaves). However, if you can’t find Chinese chives, substitute scallions and some minced garlic in the recipe.


🎥 Watch dumpling folding tutorials from Instagram:
Recipe Notes for Chinese Vegetable Dumplings:
Scaling this recipe up or down:
This recipe can be scaled up for more dumplings or down for fewer. I personally love bigger batches when it comes to dumplings because they keep well in the freezer for future enjoyment! Ideally, use a kitchen scale to weigh out the ingredients when scaling the recipe up or down, especially for the dough - it is the most accurate way.
A dry filling is key:
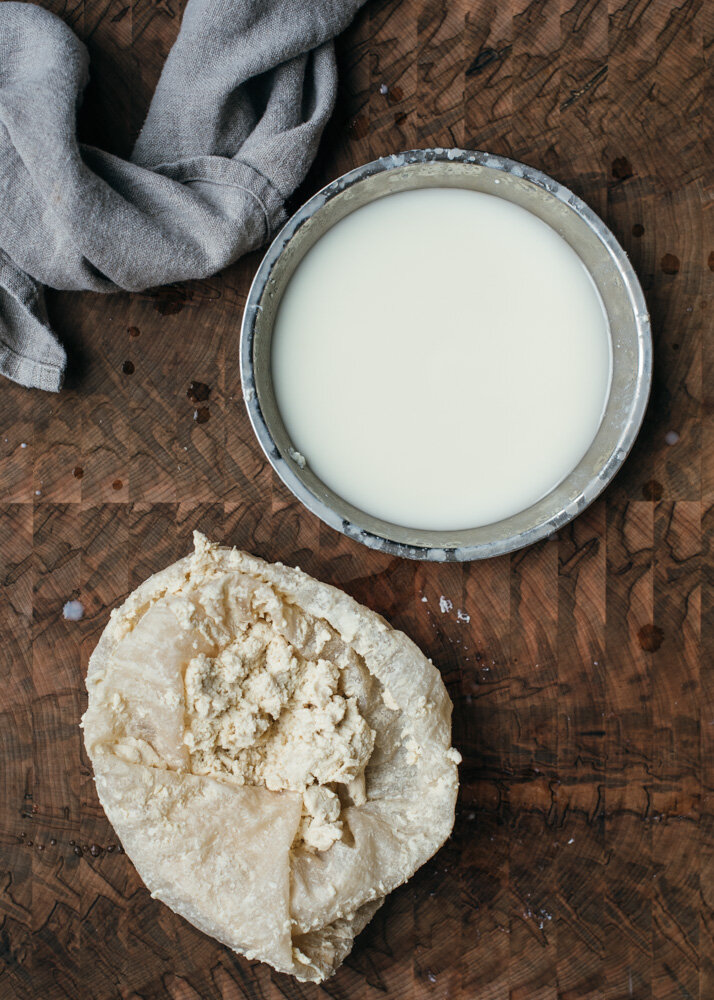
There are so many different filling options for dumplings. Really the sky is the limit. But in my opinion, the best dumpling filling (regardless of the ingredients) is one that has a firm mouthfeel and isn’t flimsy and “loose” when you bite into it. To that end, especially with a vegetarian filling like this recipe involving leafy greens and tofu – two ingredients with a ton of moisture – properly squeezing out the excess water is CRUCIAL. I use a nutmilk bag for squeezing tofu but you can also use a cheesecloth, a thin kitchen towel or even a clean cotton t-shirt will do the job. For a 450g package of tofu, I squeezed out close to 3/4 C of liquid. For the cooked leafy greens, I simply grab with my hands and squeeze in batches over a large colander.
Homemade versus store-bought wrappers:
Hey, no judgement if you’re short on time and need to use store-bought wrappers. I do it regularly, especially when I’m making 300-400 dumplings at a time! I will point out, most store-bought wrappers contain preservatives, even if they are kept and sold frozen. So annoying. I drive 20 minutes to a Japanese store to get my hands on frozen, preservative-free wrappers to keep in my freezer for future use. Defrost frozen wrappers overnight in the fridge. All that said, homemade wrappers as written in this recipe are rather easy to make. Only flour + water + time for the dough to relax. The dough is very easy to handle.
How to pleat dumplings (see images and GIF in this blog post):
There are a handful of ways to wrap dumplings - from a simple half-moon to fanciful pleats. Some require more practice than others. Here I’ll attempt to explain in words how to pleat the way I do it, with symmetrical pleats. Start by attaching opposing ends of the wrap (i.e. the 12 o’clock to the 6 o’clock part of the circle) and press gently, so it sticks together there at just that point, but leaving the rest of the edges not touching. From that center point, begin working outward to the left of the half-circle all the way to the outer end, folding a series of 3 to 5 slightly-overlapping pleats. Repeat the same pleats on the right side, from center point to the outer end. Note that when making each pleat, only one side (the outward facing side) of the wrapper is manipulated i.e. the side of the wrapper facing your body does not move. Fold a small pleat and press down to seal; repeat with another pleat slightly overlapping the first and press down to seal. Do 3-5 of these depending how you’d like it to look. At the end, pinch flat to close. It sounds a little complicated trying to describe in words – have a look at the step-by-step images and GIF at the bottom of this blog post for the visual.
Freezing dumplings:
Dumplings freeze so well and keep well frozen for up to a month or so. Line a baking sheet with parchment paper. Set dumplings in a single layer, close together but not touching each other. Put in the freezer for about an hour, or until they are very firm. Gently place them in a ziptop bag, label how many, and store in the freezer for up to a month or so. When cooking frozen dumplings, there is no need to defrost them first. Cook them straight from the freezer. They take a few more minutes than fresh ones. Test to make sure filling is heated through and dough is translucent and no longer raw.
Chinese Vegetable Dumplings
Recipe makes approximately 7-dozen (84) dumplings, enough to feed 4-6 adults depending on appetites! Extras freeze wonderfully - see head notes above.
Ingredients:
For the Dough (can be made a day ahead to rest overnight at room temperature; makes about 2 lb of dough):
4 ½ C (635g) Unbleached, organic all-purpose flour (un-sifted, just scoop and level off; or better yet, weigh on kitchen scale)
1 1/3 C (315ml) tepid water, plus 2-4 tbsp more as needed
For the Filling (makes about 6 cups):
Oil for sautéeing (I use avocado oil)
1 lb (450g) snow pea leaves/tips, tougher stalks pulled off (can substitute baby bok choy)
1 lb (450g-pack) organic extra firm tofu, squeezed dry in a nutmilk bag or cheesecloth
1 lb (450g) fresh shiitake mushrooms, stems trimmed off and chopped small
¼ lb (115g) Chinese chives, chopped (can substitute 7-8 scallions plus 2-3 cloves minced garlic)
1 tbsp tamari (can substitute light soy sauce)
2 tsp sesame oil
¼ tsp white pepper powder
Kosher salt to taste, starting with 1 tsp and work up (I use Diamond kosher salt, about 1.5-2 tsp)
Optional for Dipping, amount per person:
2 tbsp Chinese black vinegar, 2 tsp Chinese chili oil, ½ tsp toasted sesame oil
Method:
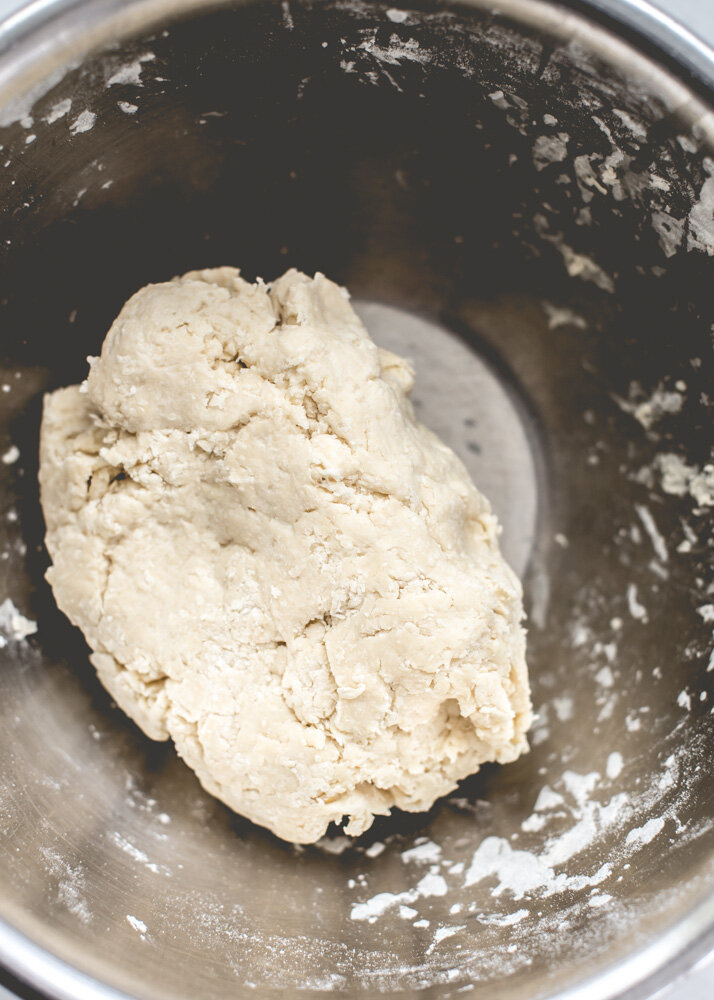
Make the dough (skip if using store-bought wrappers - see head notes): Place the flour in a large mixing bowl. Put bowl on top of a moist kitchen towel to help the bowl stay in place while you stir. Slowly drizzle the 315ml of water in a steady stream while mixing with your hand or a pair of chopsticks. Once incorporated, the dough should still look a bit scraggly with some loose, dry bits throughout. See image below.

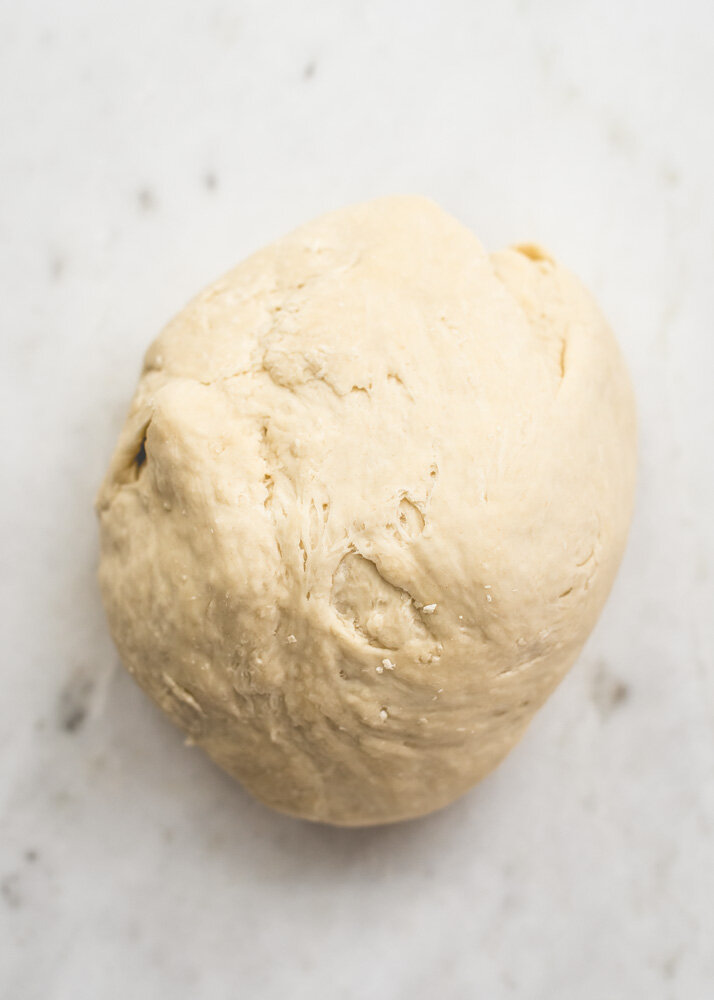
Start kneading the dough with your hands, only sprinkling teeny bits of water over very dry areas as needed - see first image below. Knead for 8-10 minutes until very smooth (see second image below, after 5 minutes of kneading). Shape the dough into a ball and allow to rest 15 minutes under a tea towel. Knead again for 3 minutes (see third image below).
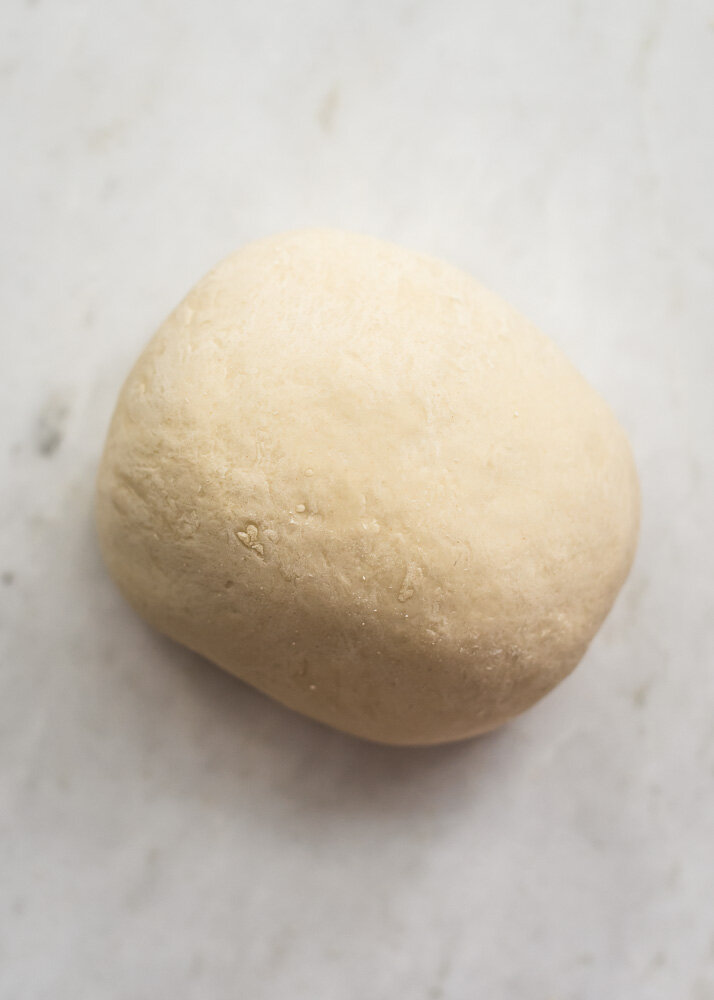
Drizzle a tiny bit of oil into the mixing bowl and roll the dough ball around to lightly coat all over. Cover with tea towel again and this time, rest for at least 1 hour or up to overnight (use food wrap to wrap tightly if resting overnight). The longer the dough rests, the softer it gets. Softer dough is easier to handle but you also want the dough to retain some chewiness. Meanwhile, make the filling.

Dough after resting for 2 hours.
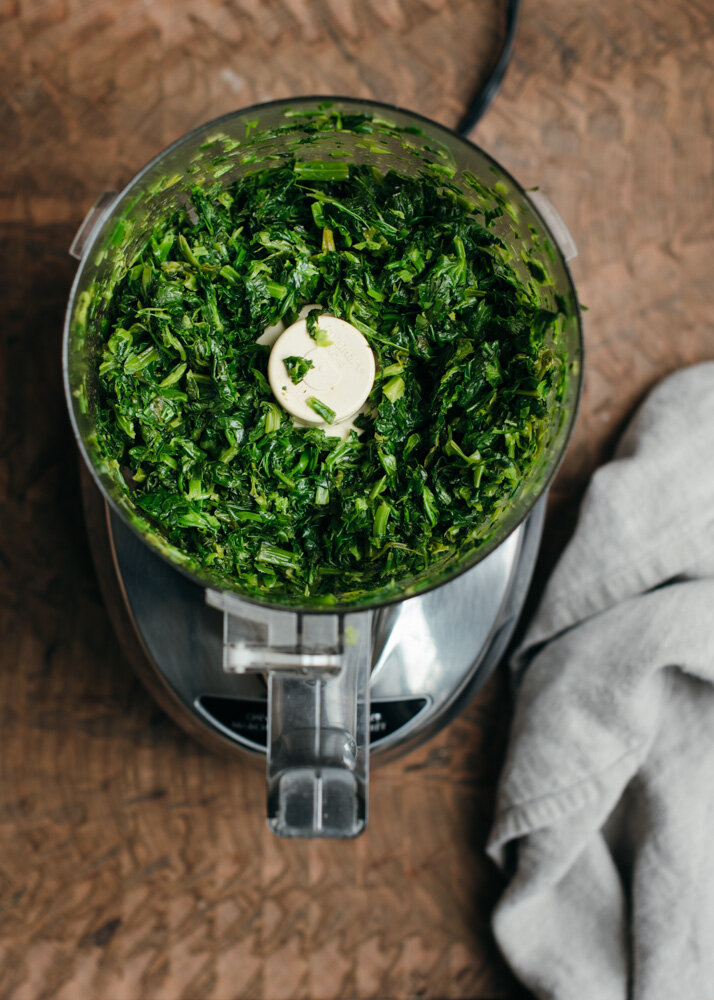
Prepare the filling: Preheat a wok or large cast iron pot over medium heat. Drizzle some oil, add snow pea leaves and sauté until just wilted but still bright green, about 1-2 minutes. Do in batches if needed and do not overcook. Place back in colander to cool. Next, drizzle a bit of oil and saute the chopped chives about a minute and add the chopped shiitake mushrooms to brown, about 3-4 minutes. Set into large mixing bowl. The sautéed snow pea leaves should be cool to touch now. With the colander set in the sink, grab handfuls of the greens with both hands and squeeze excess water out. Repeat until all of it has been squeezed. Add these to the bowl of chives and mushrooms. Finally, add the squeezed tofu, tamari, sesame oil, white pepper powder and kosher salt to taste. Mix well. Taste a bit of filling and adjust seasoning to your taste. Filling should be on the saltier side since it will be wrapped inside unsalted dough.
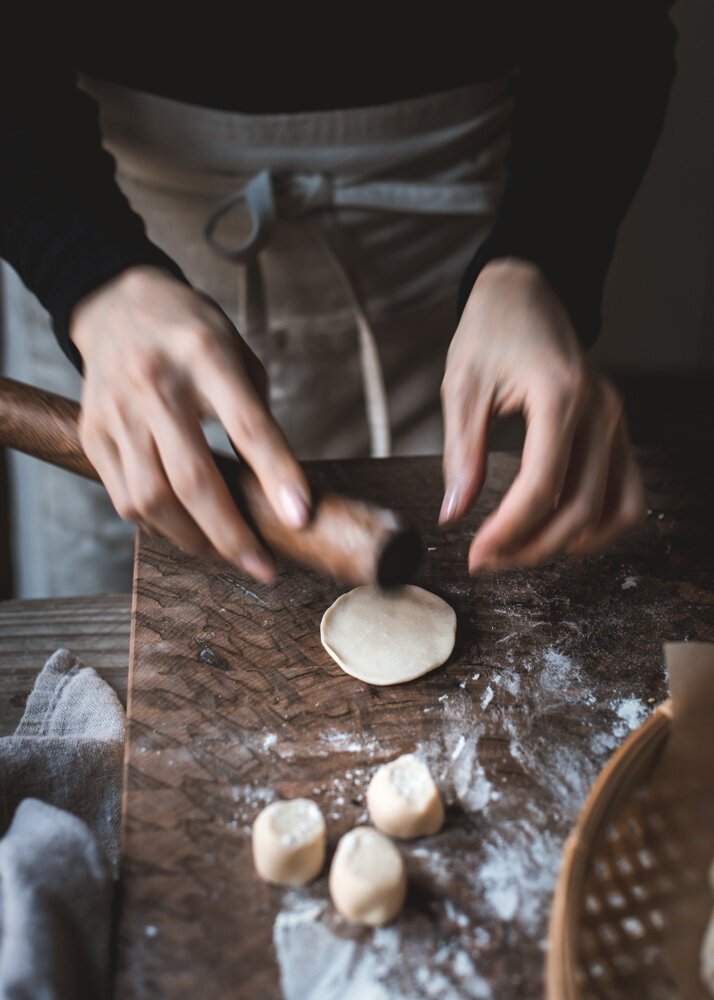
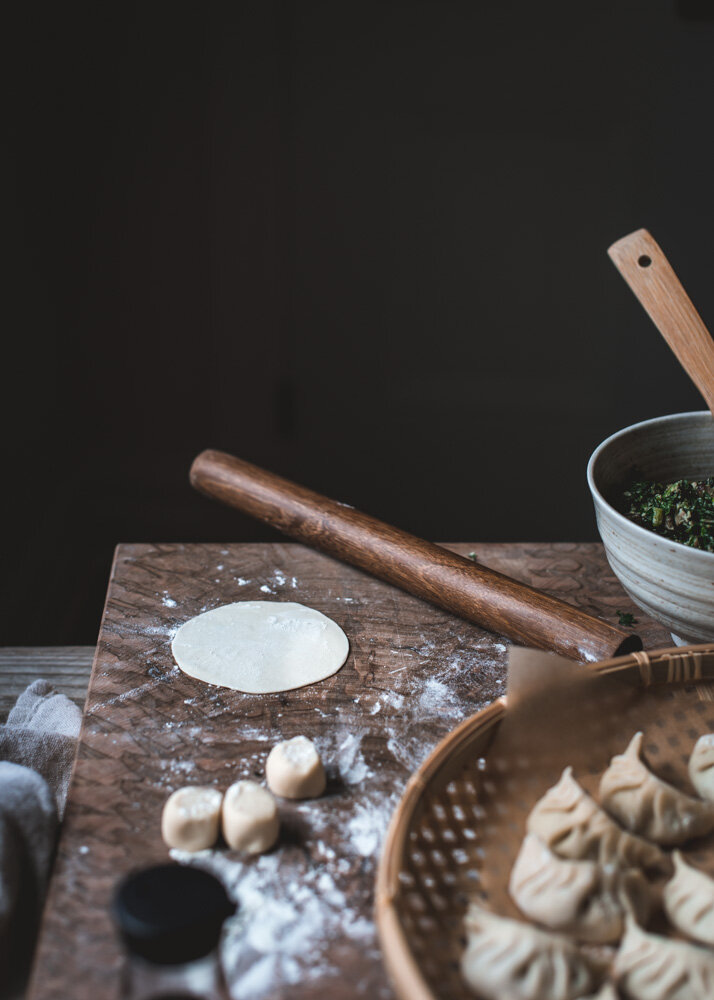
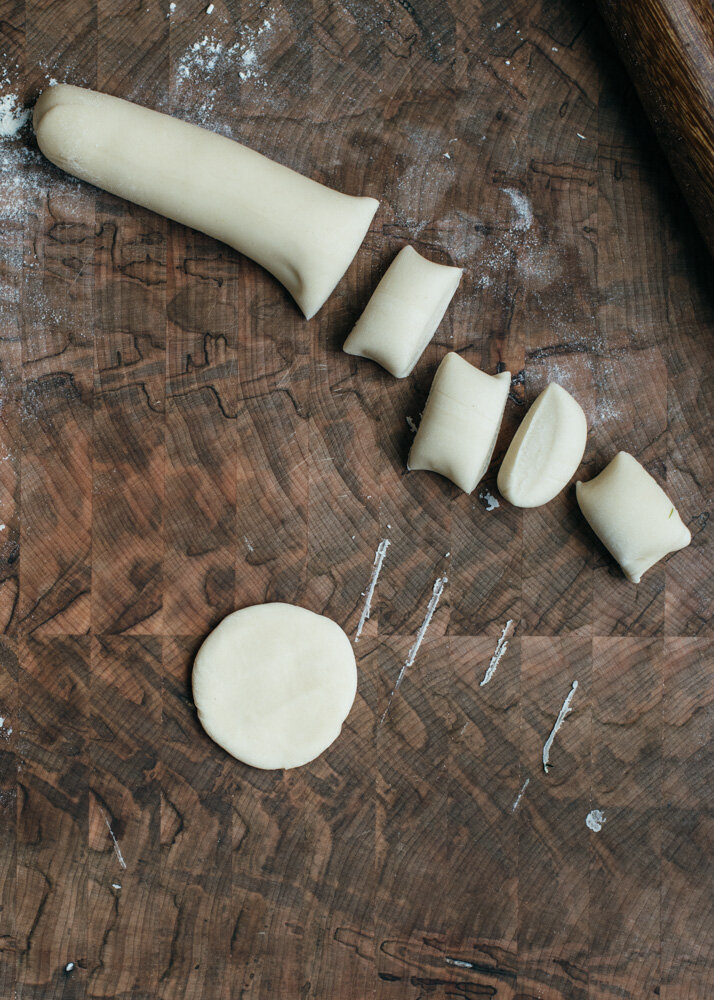
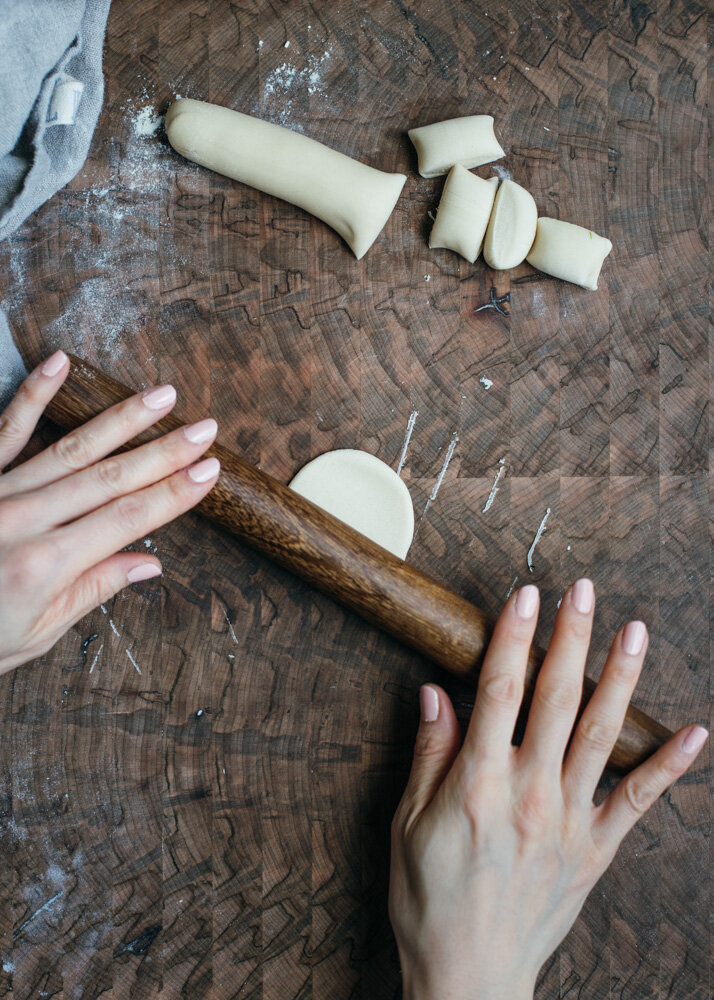
Wrap the dumplings: Set up your wrapping station. Line two baking sheets with parchment paper to hold the wrapped dumplings. Set out the bowl of filling and a small dish of cold tap water for sealing edges. Have some flour on hand for dusting as you roll out dough. A kitchen scale is useful to weigh out dough pieces to ensure you end up with same-sized wrappers (but don’t worry if you don’t have one, you can also eye ball it). Roll wrappers and fill and fold them in small batches, as the rolled-out wrappers dry out quickly. Cut the dough ball into 6-8 more manageable pieces. Take one cut piece (re-covering the rest under the tea towel) and roll it with your hands into a long rope about 1” in diameter. Cut into 1 tbsp sized pieces, about 10g each. Dust pieces with flour and also your work surface. With cut-side facing up, flatten one piece of dough with the palm of your hand. Dust a small rolling pin to roll the dough into circles approximately 3½” in diameter, with the edges thinner than the centre of the wrapper.
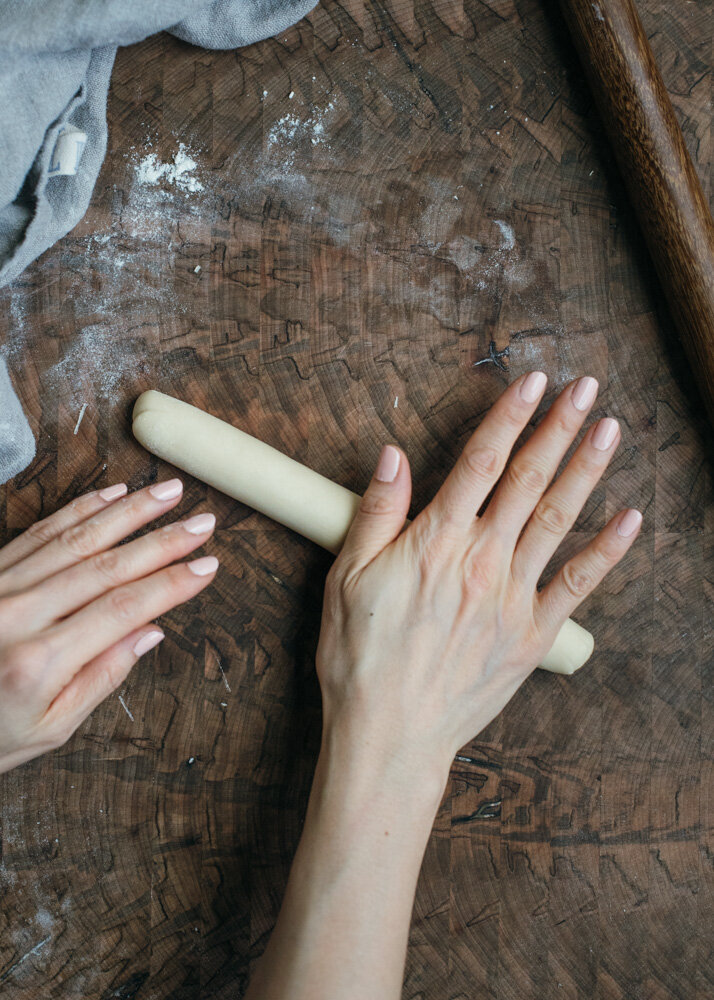
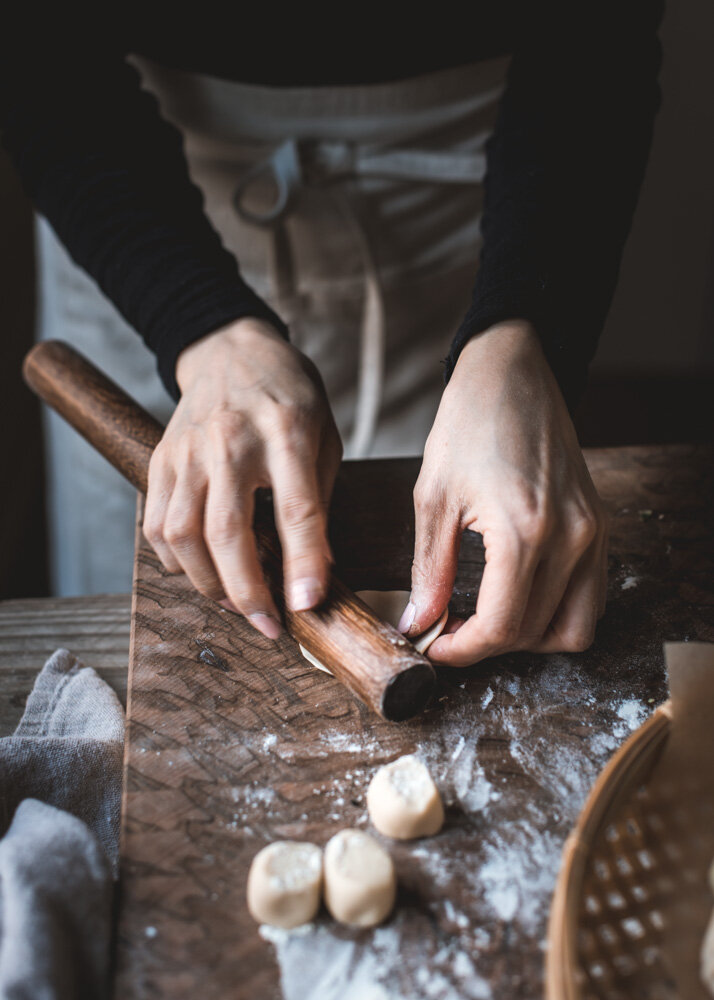
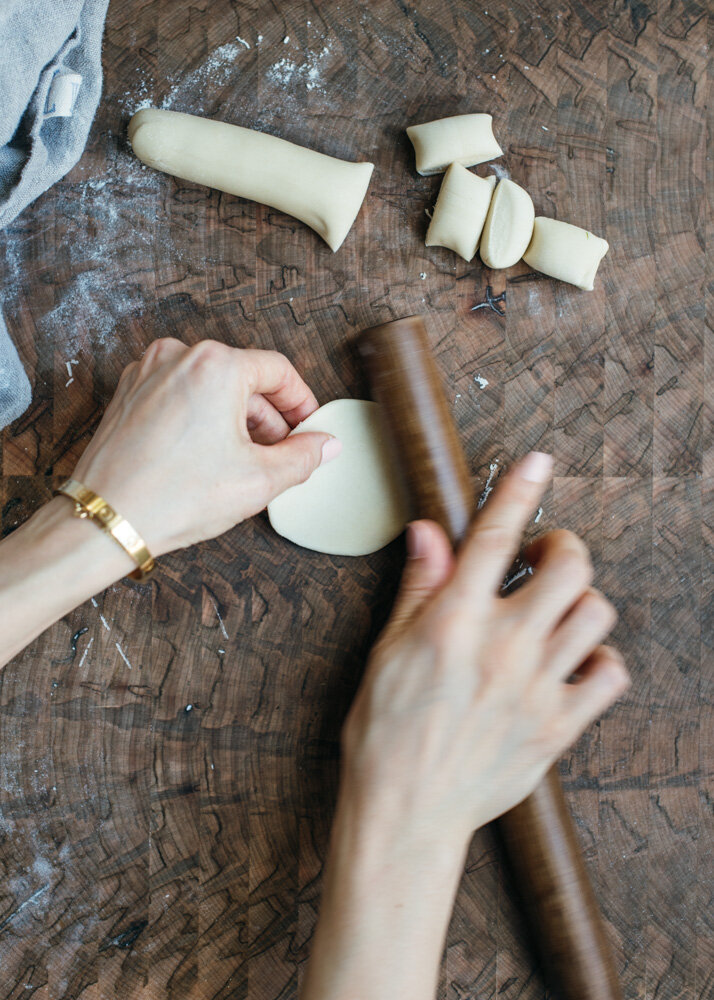
You can roll dumpling wrappers in one of two ways: (1) roll forward and back while rotating the dough 45 degrees after each pass, exactly like you would when rolling out pie dough - see left image below OR (2) left hand rotates the dough simultaneously while right hand rolls the rolling pin over the right edge of the dough (or vice versa for Lefties) - see middle image below. I actually do a combo of the two. I start with method 1 because I find it easier to create a nice round shape that way. Then once I’ve reached about 80% of the desired size, I switch to method 2 to achieve the thinner edges all around. Don’t worry, it needs not be perfectly circular. And practice makes perfect! Dust lightly with flour as needed. Roll out 3-5 wrappers at a time, then move to the next steps.

Place about 1 tbsp of filling in the center of your dough wrapper, leaving a border all around. Adjust amount of filling such that you get a plump dumpling (nothing like a flaccid dumpling) but can still comfortably seal the edges without a risk for coming apart during cooking. Dab one finger in the water and run it around the outer edge of the wrapper to wet it. This helps to form a secure seal. Wrap the dumpling however your wish – there are a myriad of styles from simple to fanciful! The quickest and simplest way is to fold it in half, into a half moon. My personal go-to is the symmetrical pleat, as pictured in this post.
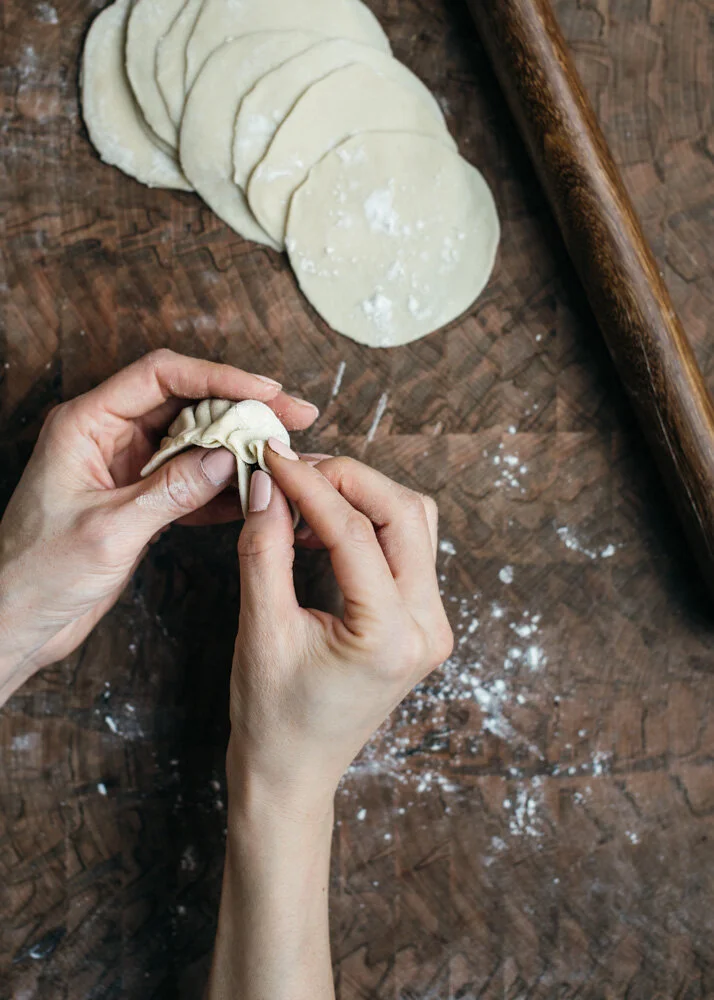
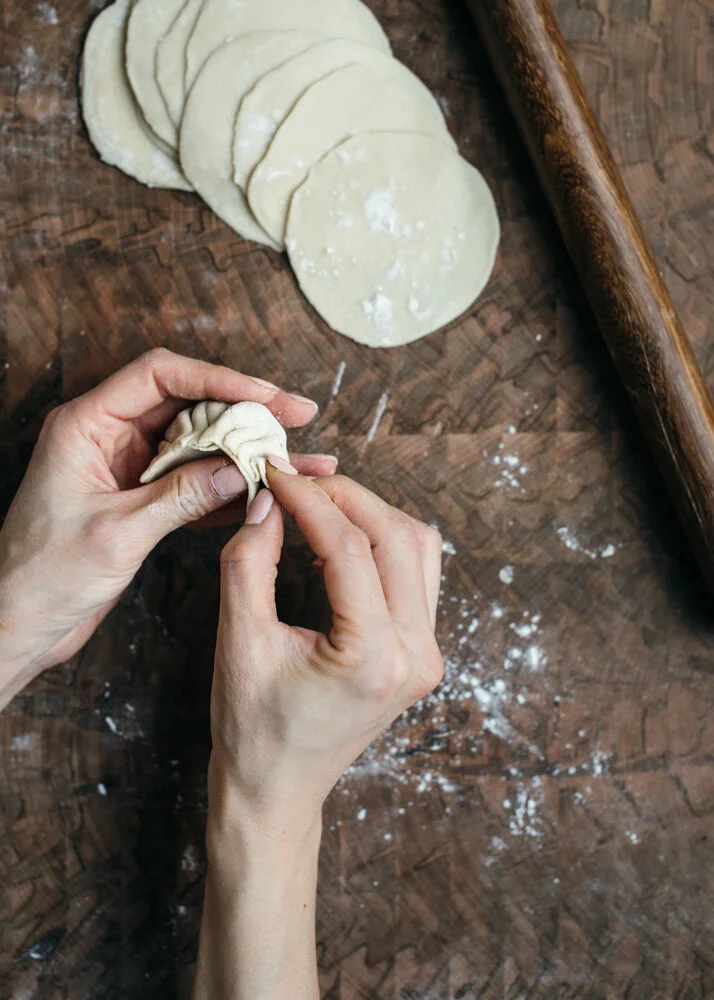
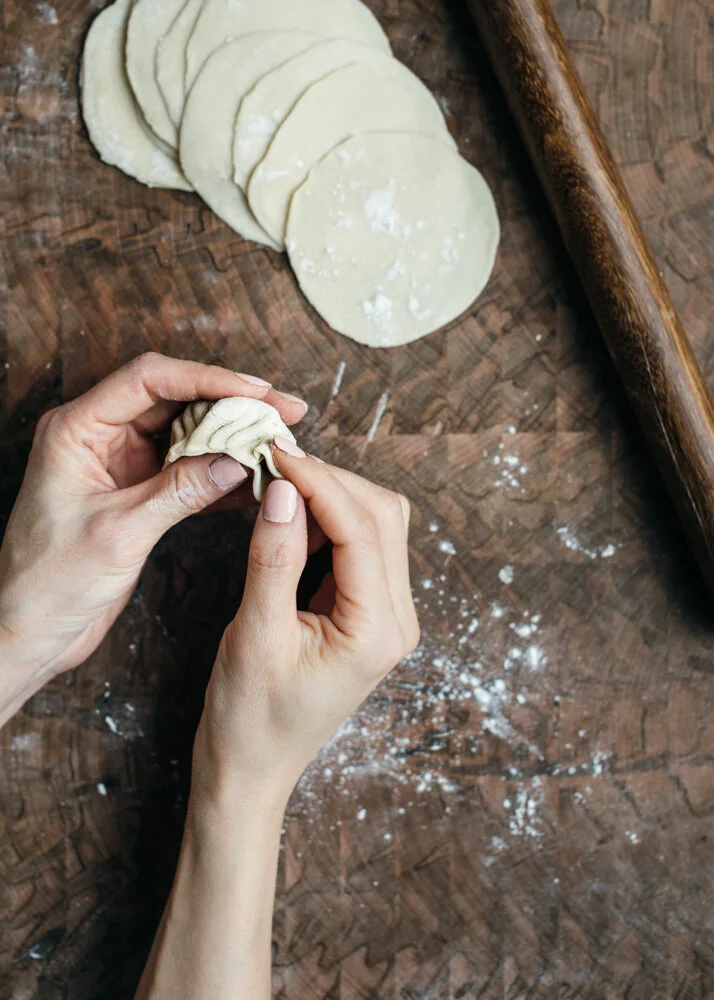
My pleating method (step-by-step images): Start by attaching opposing ends of the wrap (the 12 o’clock to the 6 o’clock part of the circle) and press gently, so it sticks together there at just that point, but leaving the rest of the edges not touching. From that centre point, begin working outward down the left of the half-circle all the way to the outer end, folding a series of 3 to 5 slightly-overlapping pleats. The direction of the fold is always towards the centre. Pinch at the end to seal. Repeat the same pleats on the right side, from centre point to the outer end. Pinch at the end, Note that when making each pleat, only one side (the side facing away from you) of the wrapper is manipulated i.e. the inward facing side of the wrapper does not move. Fold a small pleat and press down to seal; repeat with another pleat slightly overlapping the first and press down to seal.
The following series of images show step-by-step how I pleat. You will see the left side of the dumpling has already been pleated. The first pleat on the right of the centre-point has also been folded. In image 1, I am folding the second pleat, slightly overlapping the first. And so on, making my way across the right side of the dumpling with overlapping pleats. I pinch at the end to seal.
For a video tutorial, see it here: How To Wrap Dumplings - Classic Pleats.


Cook the dumplings: In this recipe, we are boiling the dumplings. It may not be as photogenic / Insta-worthy as the pan-fried way, but it is the coziest and my absolute favorite way to eat dumplings. Also, a practical benefit is you can boil a lot more dumplings at a time than pan-frying or steaming. To boil, set a large pot of water to a rolling boil. Place dumplings in gently, one by one or a few at a time with the aid of a handled-strainer. You can cook as many as 30 dumplings at a time, provided your pot is large and they are not over-crowded. Stir dumplings around regularly to prevent sticking to the bottom. Allow the water to come back to a boil and the dumplings to bop to the surface, about 2-3 minutes. Keep at a boil to cook until dough has become translucent, for a total cooking time of 5 minutes or so. [If cooking dumplings from frozen, add a couple of minutes to the cook time]. Test a dumpling for doneness. The filling should be heated through and the dough slightly chewy, tender and not raw. The beauty of this filling is there is no need to worry about raw meat. Everything in the filling is cooked. Once done, strain right away. Don’t walk away to do something else and risk overcooking the dumplings. Overcooked = soggy dough and nobody likes that. Serve fresh with dipping sauce. To pan-fry: You can still pan fry a batch. In fact, we often eat the first round boiled, followed by second round pan-fried! Best of both J Heat a non-stick or well-seasoned cast iron skillet over medium to medium-high heat. Drizzle oil and place boiled/drained dumplings in skillet. Fry 3-4 minutes on each side, or until desired crispiness. Enjoy!
Hi, I’m Sonia
I share recipes inspired by my food cravings and what I make for my family. My role as a working mom of two girls, my life in Toronto Canada and my background as a Chinese immigrant from Hong Kong all inform the things I love, crave and create. This means an emphasis on wholesome recipes that are approachable for busy weeknights and fun recipes to make on weekends and for friends!
homemade food to nourish and indulge …
More about Sonia >