Remember my last recipe, those Sticky Rice Cakes with the salt-cured yolks and peanut butter inside? It left me with 8 orphaned egg whites so had no choice but to at least use up 4 of them in this Pavlova. Twist my rubber arm...

Pavlovas don't normally come to mind in the winter since they are generally regarded as a summer dessert. I always questioned the sense in that though? High humidity is the serial murderer of pavlovas. Sure there are other factors that could undermine your pavlova, such as whites contaminated with yolks or grease / water in the mixing bowl, but I assert that weather is public enemy number one since it is not a factor you get to control.

When you're looking for that perfect crispy exterior that yields into a marshmallow-y center, but the day you're serving it to a large group of people turns out to be a hot and rainy day in August with 35% humidex, a Plan B would have been wise. That was my first time baking meringue, almost ten years ago. I made four dozen mini meringue cookies topped with whipped cream and strawberries that were perfect and beautiful. I ever so carefully transferred them to my brother-in-law's store opening but midway through the party, all of them turned into tragic little puddles of mush.
I learned a lesson that evening I won't easily forget - humiliation tends to leave a mark, doesn't it? So when the thought of making a pavlova popped into my head last week, I finally found the ONE SILVER LINING of this dreadfully frigid winter in Toronto: no risk of humidity!
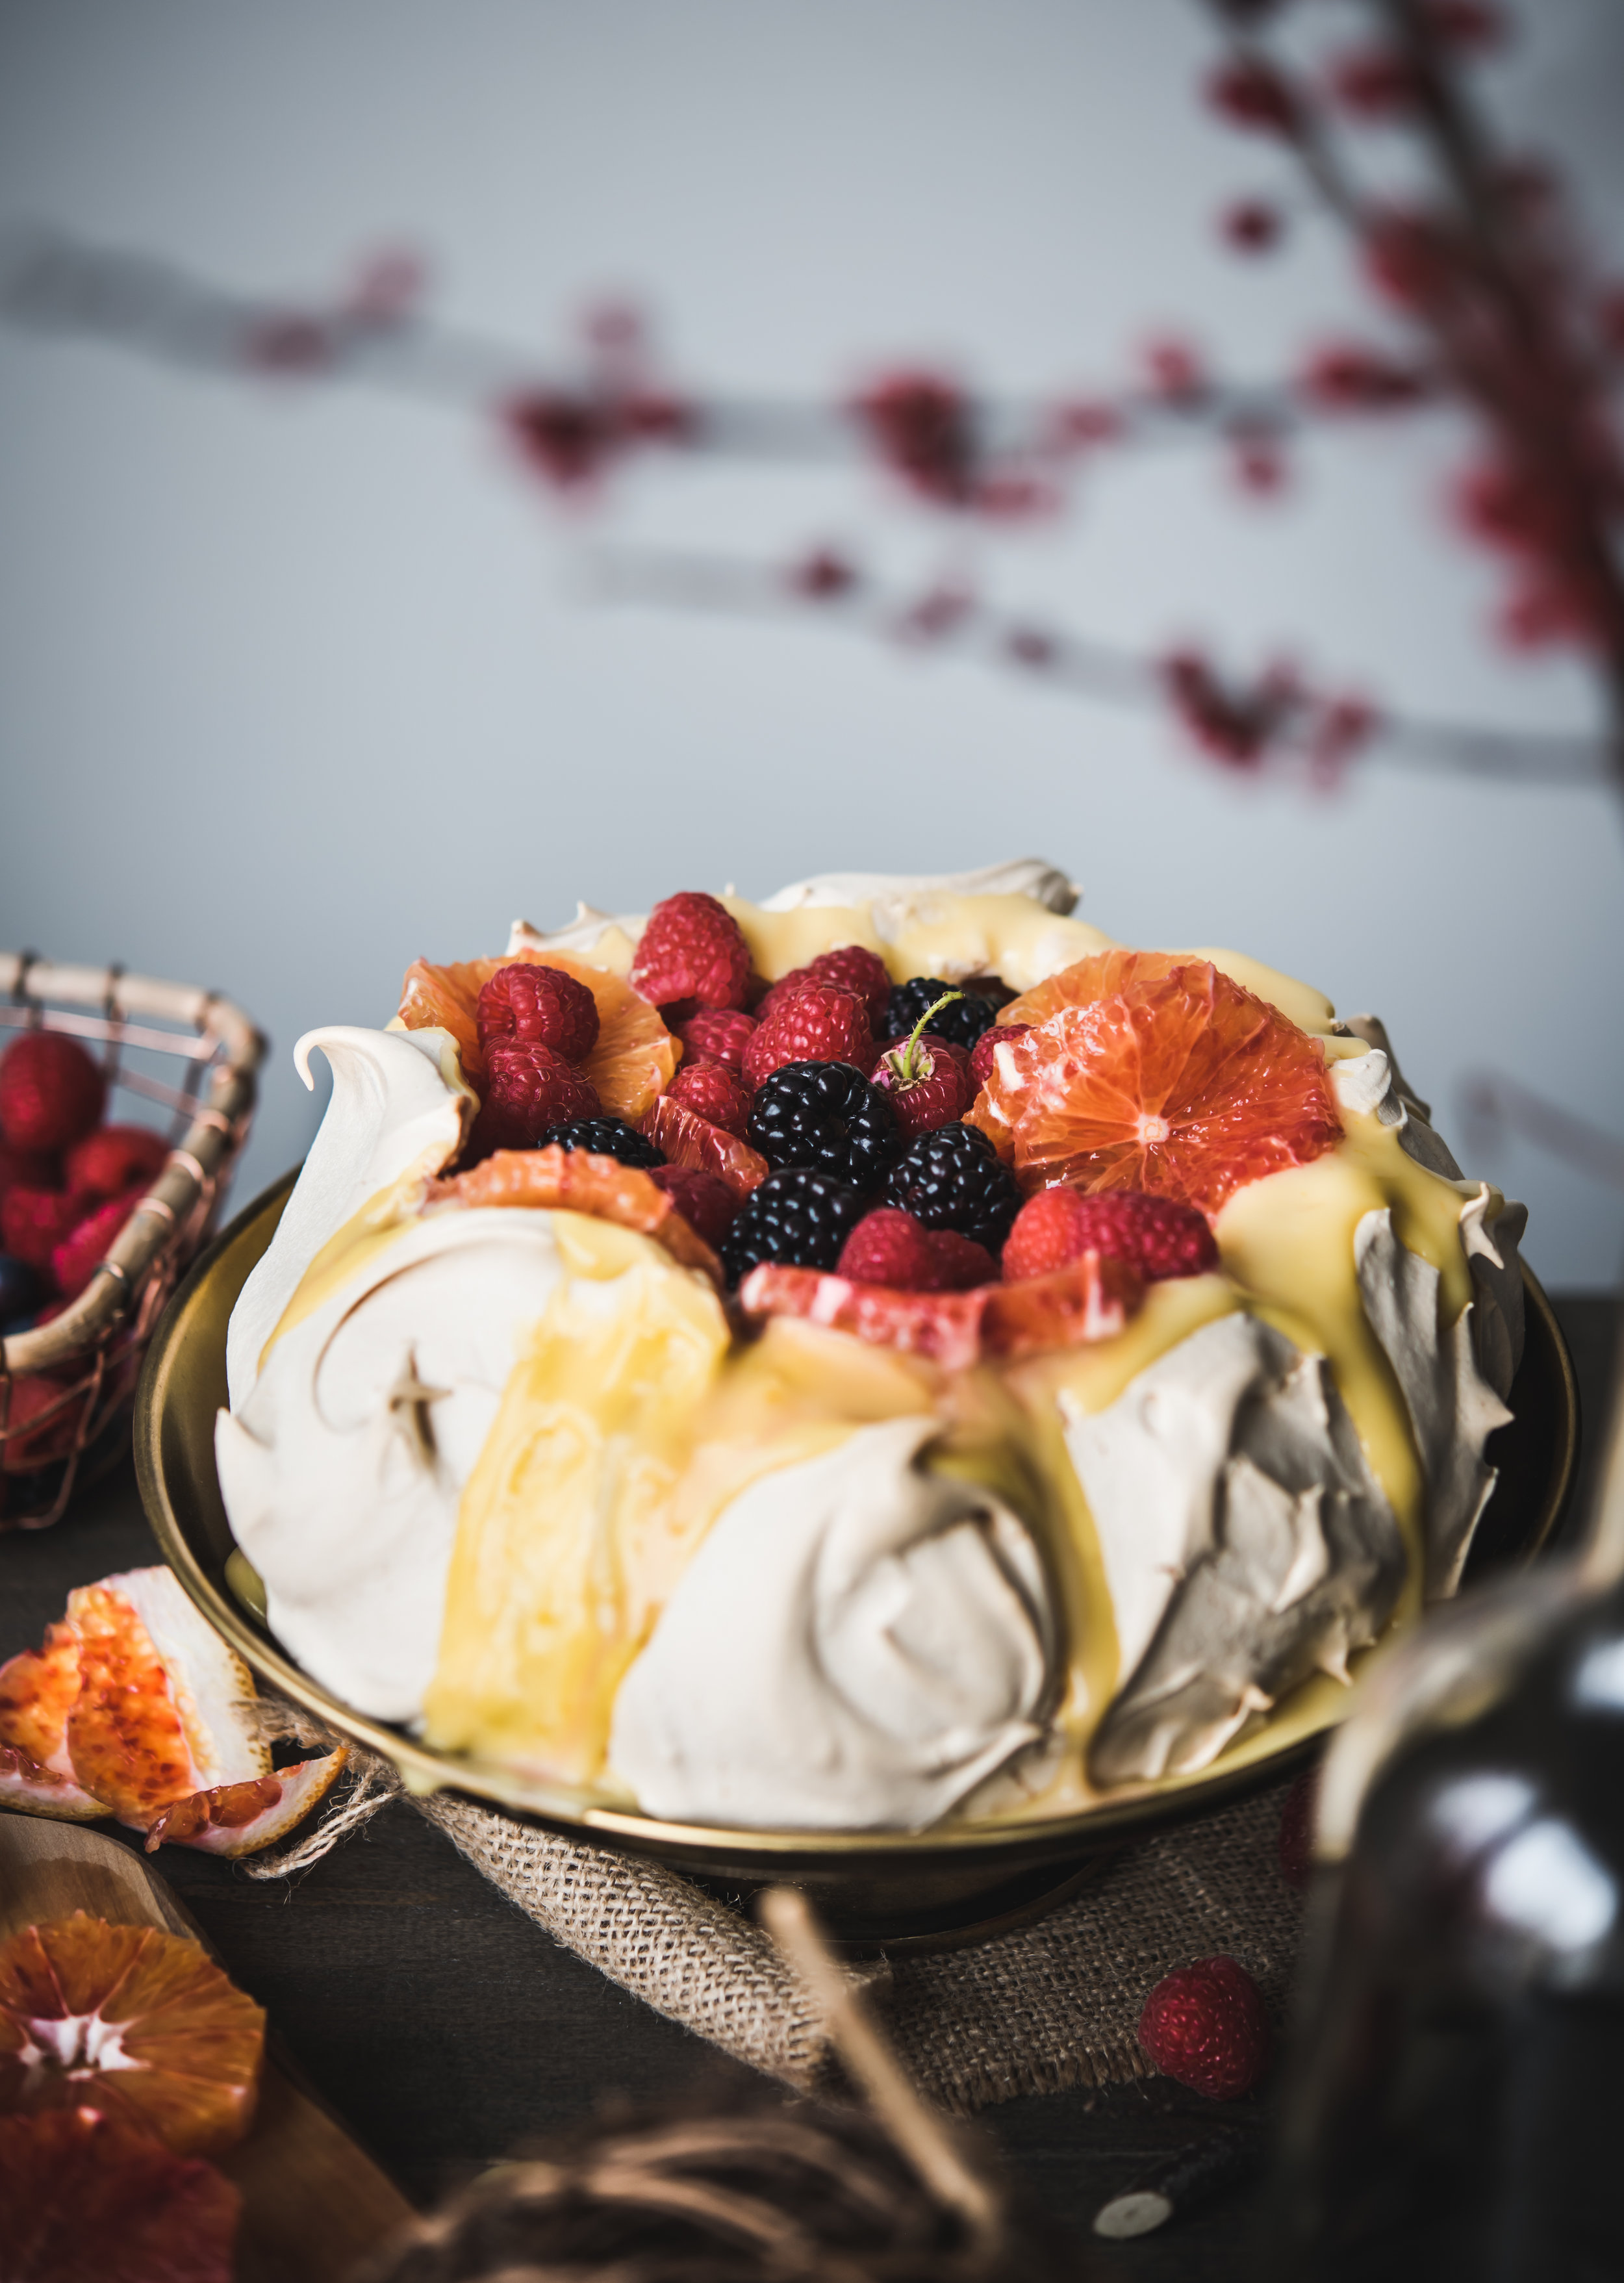
Apart from the dry weather being in my favor, I also thought how perfect to feature my most beloved winter citruses in this stunning dessert - Meyer lemons and blood oranges. If these varieties are not accessible for you or not currently in season, regular lemons (for the curd) and navel oranges (for the top) make excellent substitutions.
When you read the recipe, you'll see that the lemon curd is slightly healthier than traditional curds since it uses honey as the sweetener and ghee as the fat (or else I suggest grass-fed organic butter). I love how the sweet-tartness of citrus balances the sweet meringue! Isn't it all just so lovely to look at? It's even lovelier to taste.
You may also like my PEACH + PASSIONFRUIT PAVLOVA!
recipe head notes - winter pavlova with Meyer lemon curd:
1. Meringue: It's preferable to bake the meringue in advance and allow it to cool down gradually while still inside the oven overnight or as long as you can. The slow cooling down helps prevent collapsing and cracking. But don’t worry too much even if there is cracking or collapsing in the middle - this does happen and won’t affect the taste of the pavlova whatsoever.
2. Castor sugar: Aka superfine sugar can be store-bought or made by whizzing granulated sugar in the food processor until very fine. It is preferably to use superfine sugar in the meringue as it dissolves more quickly than granulated sugar, ensuring a smooth meringue.
3. Corn Starch: The cornstarch creates a chewier, less brittle texture in the baked meringue. I used to omit this out of practicality because I rarely had cornstarch in the house during our Paleo grain-free days. Now I buy organic corn starch and use it in this recipe.
Winter Pavlova with Meyer Lemon Curd
Gluten-free, dairy-free. Recipe makes one 8” pavlova which serves 8.
INGREDIENTS
For the Meyer Lemon Curd (makes ~ ½ cup):
1 large egg
1 large egg yolk
3 tbsp honey
Zest of 1 Meyer lemon (or regular lemon)
¼ C (60ml) fresh lemon juice, from 2-3 Meyer lemons (or regular lemons)
Pinch sea salt
3 tbsp ghee (or grass-fed organic butter if dairy is not an issue)
For the meringue:
4 large fridge-cold egg whites (preferably weighed on a scale to 5 oz of whites)
1 C (220g) superfine aka caster sugar
1 tsp white vinegar OR pinch cream of tartar
1 tbsp cornstarch
For topping the pavlova:
½ C Meyer lemon curd from above
1-2 blood oranges, peeled and cut into ¼" thick slices (can sub other orange varieties)
Assorted berries, washed and blotted well on paper towels
METHOD
Prepare mixing bowl and whisk: Take out a large bowl or stand mixer bowl and whisk attachment. Make sure everything is completely clean and free of any grease or water.
Separate egg whites: While eggs are still cold (for easier separation), separate whites from yolks. Be careful not to get a single drop of yolk in the whites. Egg whites contaminated with yolk will not whip up properly and is better used for breakfast scramble or fried rice. If you need to be extra careful, separate one egg at a time into a small bowl first and only place the white in your stand mixer bowl once you're successful. If time permits, allow egg whites to come to room temperature – this helps them whip up fluffier.
Meanwhile, make the lemon curd: Heat and whisk all the curd ingredients in a small pot over low heat. Once the ghee (or butter) has completely melted, increase the heat to medium-low and cook 5-7 minutes or until tiny bubbles surface, stirring frequently. Strain over a sieve and set aside. The curd will thicken further as it cools. If making in advance, store refrigerated in an air-tight container until ready to use.
Preheat oven and prepare baking sheet: Preheat oven to 350f. (**note** you will turn this down to 250f later, before placing meringue in the oven). Place oven rack to one notch below the middle. Draw an 8" circle on each parchment paper and flip drawn-side down on the baking sheet.
Whip meringue: Whisk egg whites on medium-high (level 6 on stand mixer) until soft peaks which means the peaks are just starting to hold and doesn't stand on their own (this provides a great visual guide for soft, medium, firm peaks). Add sugar by tablespoons as you continue whisking. After all sugar is in, increase speed to high (level 8 on stand mixer) and continue beating 2-3 minutes more until thick and glossy, and sugar is completely dissolved. Confirm by rubbing a bit of meringue between your fingers – there should be no grit. Stir in vinegar or cream of tartar and corn starch. Mix well.
Form and bake the meringue: Dab a bit of meringue on four corners of the underside of the prepared parchment to keep it from lifting up when you form the pavlova. Scoop about half the meringue onto the center of the drawn circle and begin shaping it to the desired size with a spatula. Scoop out the remaining meringue on top and shape into a slightly curved dome. This is the fun part - use your spatula to make swooshes or the design of your choice on the sides. Place baking sheet gently in oven and close the oven door preferably without banging anything. **TURN THE OVEN DOWN TO 250f**. Bake without peeping for 1.5 hours. Turn oven off. Open oven door a bit (wedge a wooden spoon handle to keep it ajar if needed) and allow the pavlova to gradually cool fully. You can leave it inside the oven like that as long as overnight. If you are in a hurry, cool it down out of the oven on a wire rack but it may crack more, if that bothers you.
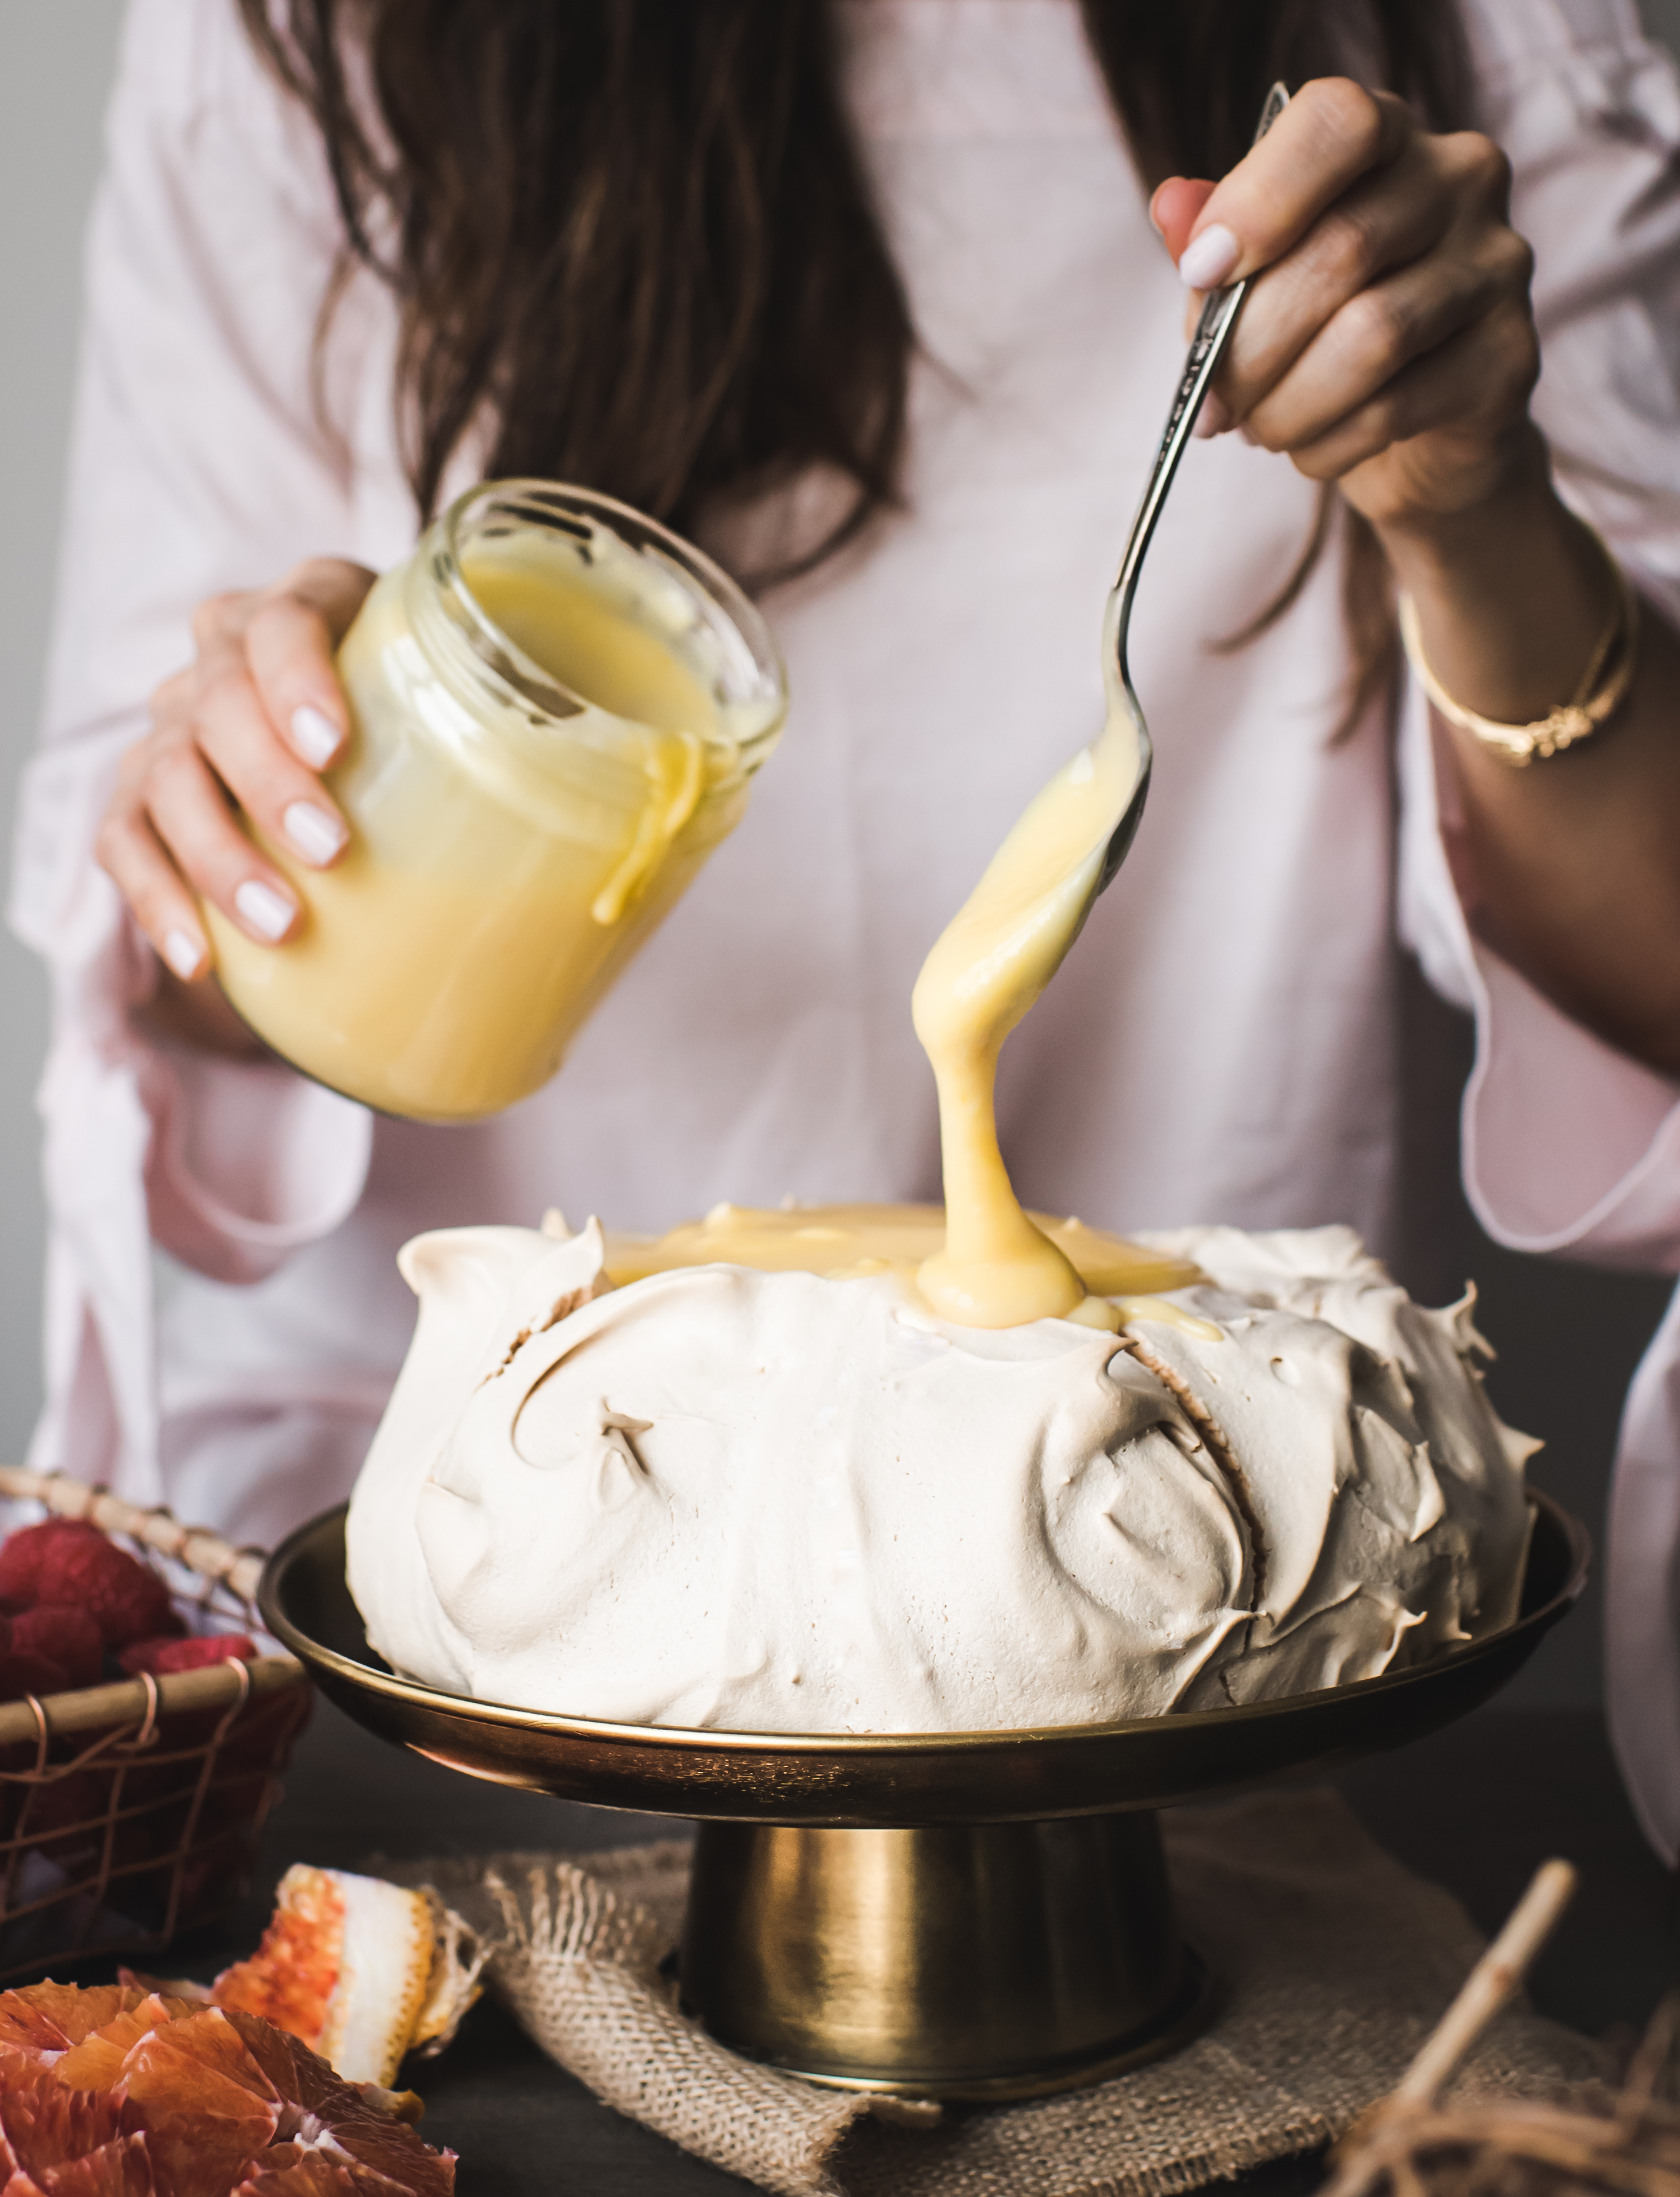
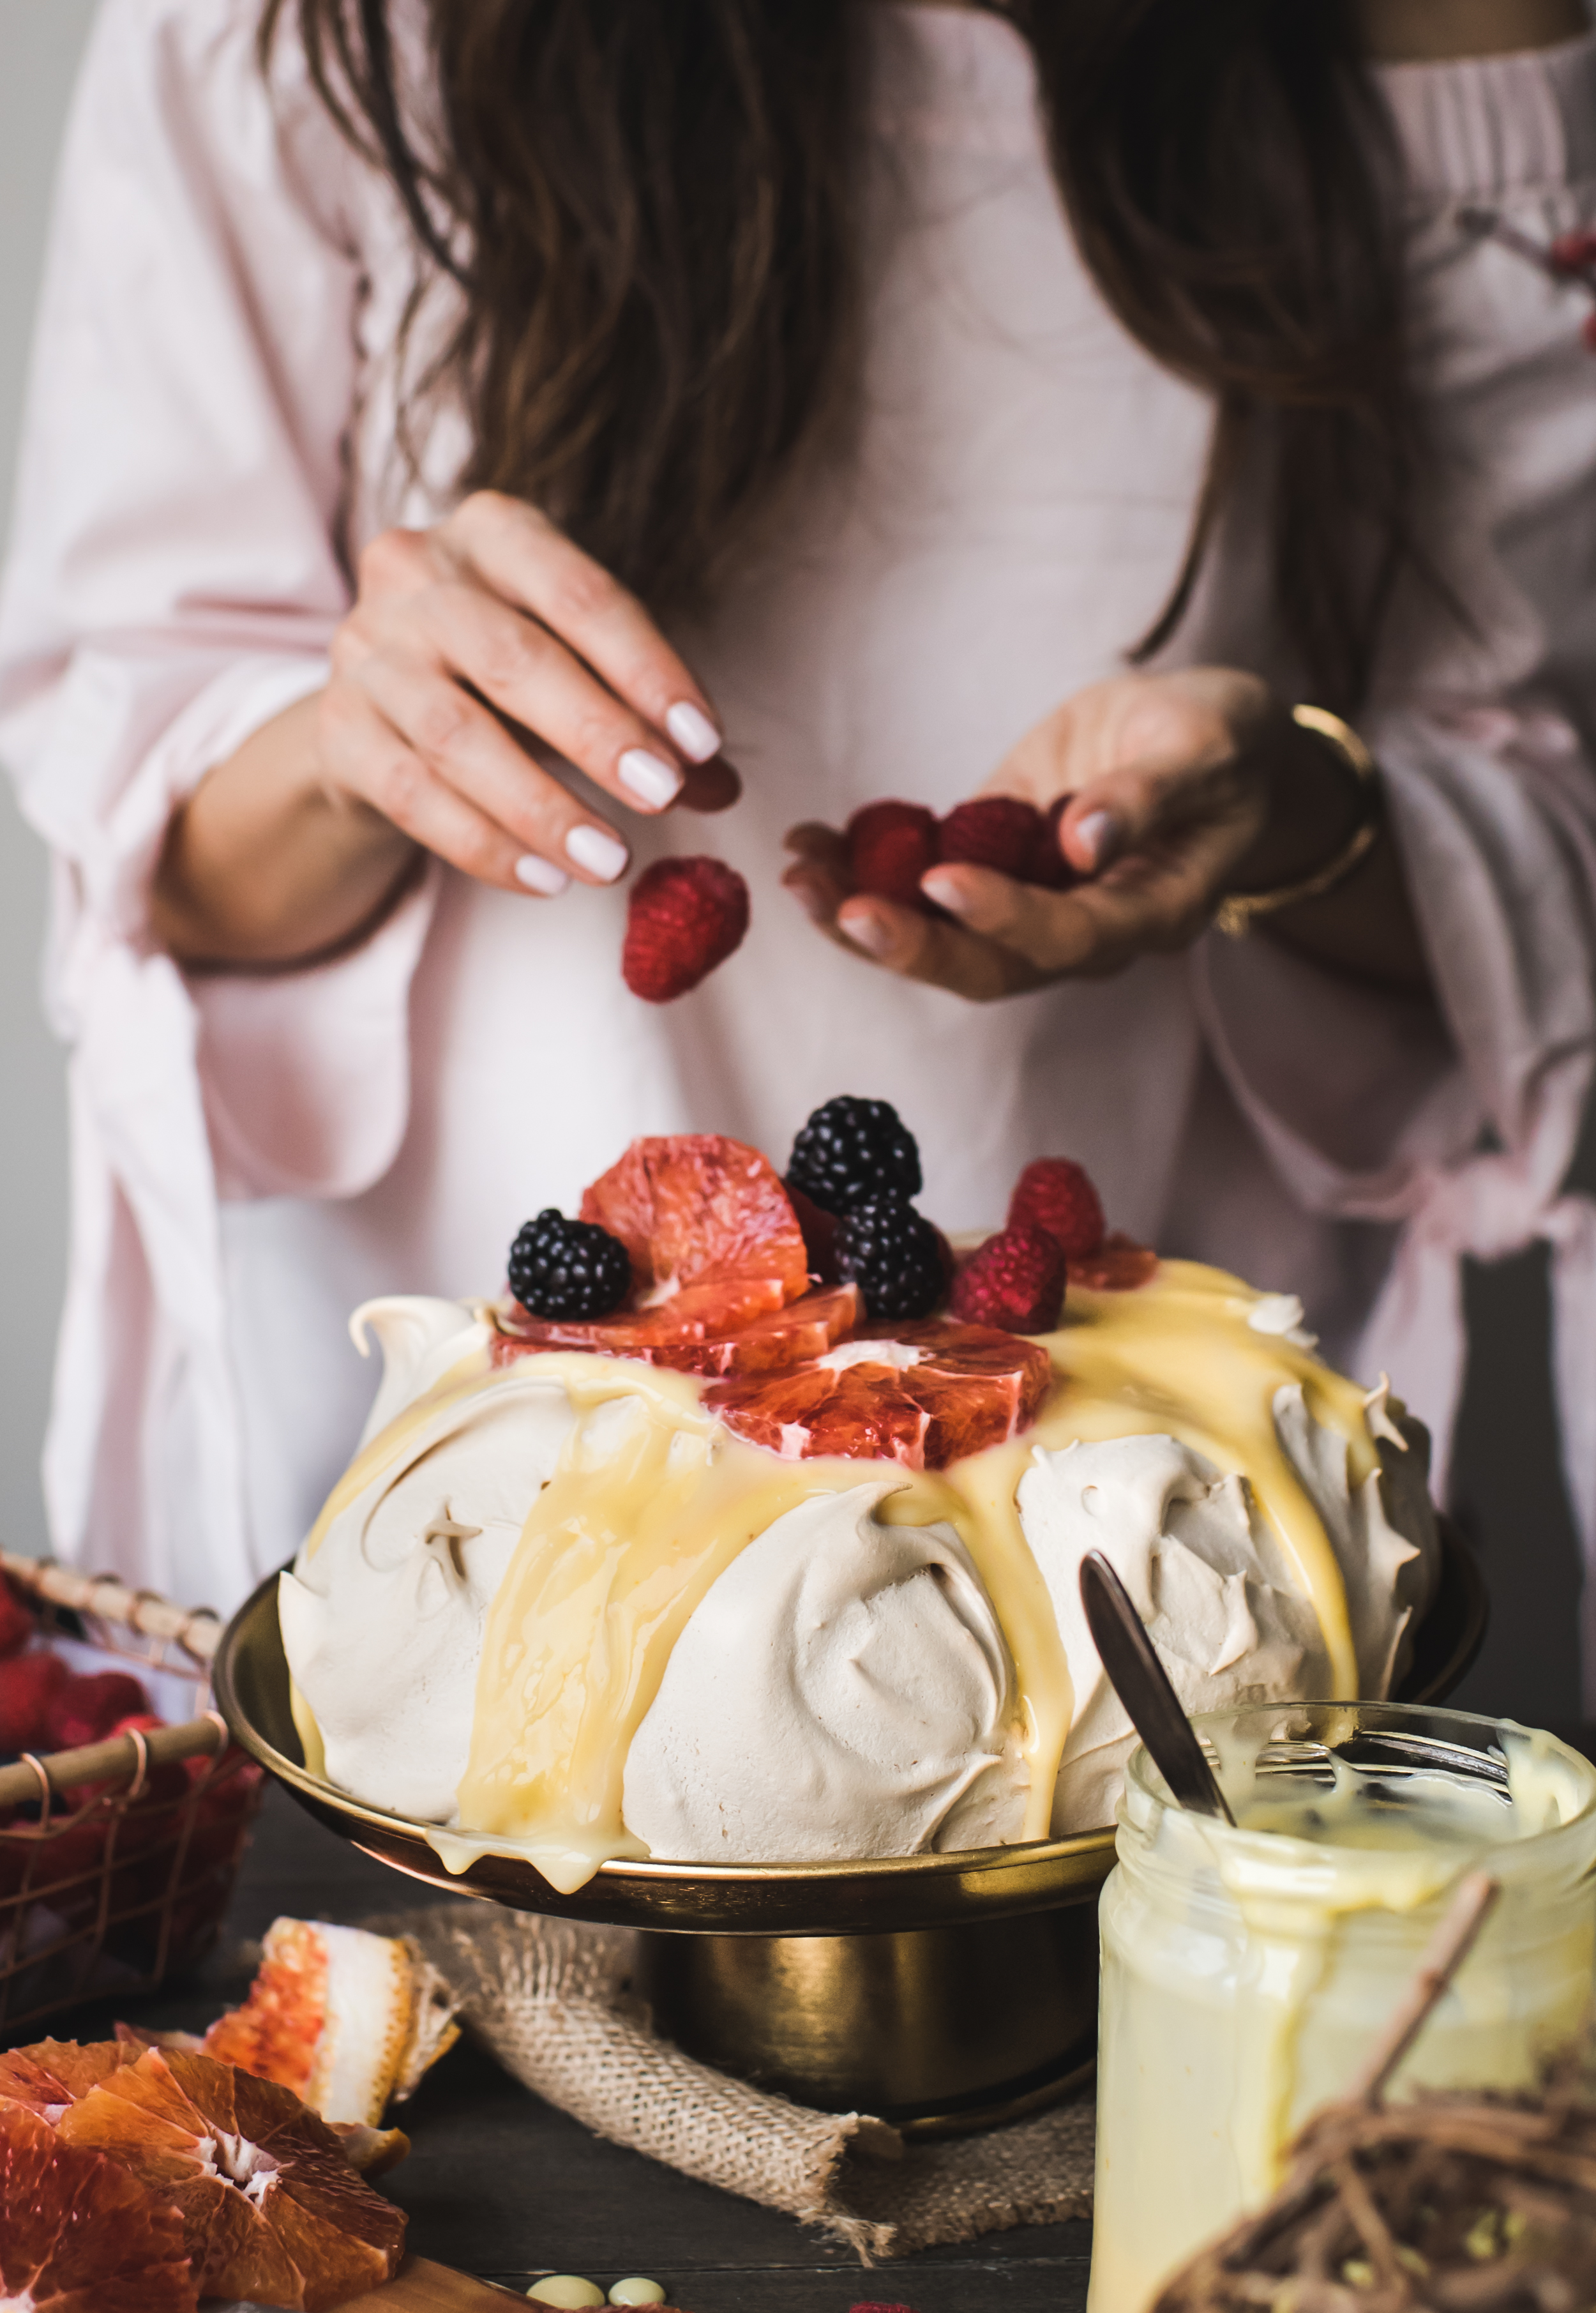
Assemble: Once ready to serve, pour lemon curd over the top of the pavlova. Add prepared fresh fruits and serve immediately. Avoid putting toppings on too early (I'd say 20-30 minutes max) or else the weight might cause the pavlova to collapse. This does happen from time to time, and it did when I took too long photographing it for the blog post. But can you blame me? So pretty!
Enjoy!
If you like this recipe, pin it to Pinterest! You can also leave me a comment below to let me know what you think of this post - I would love that. :)
