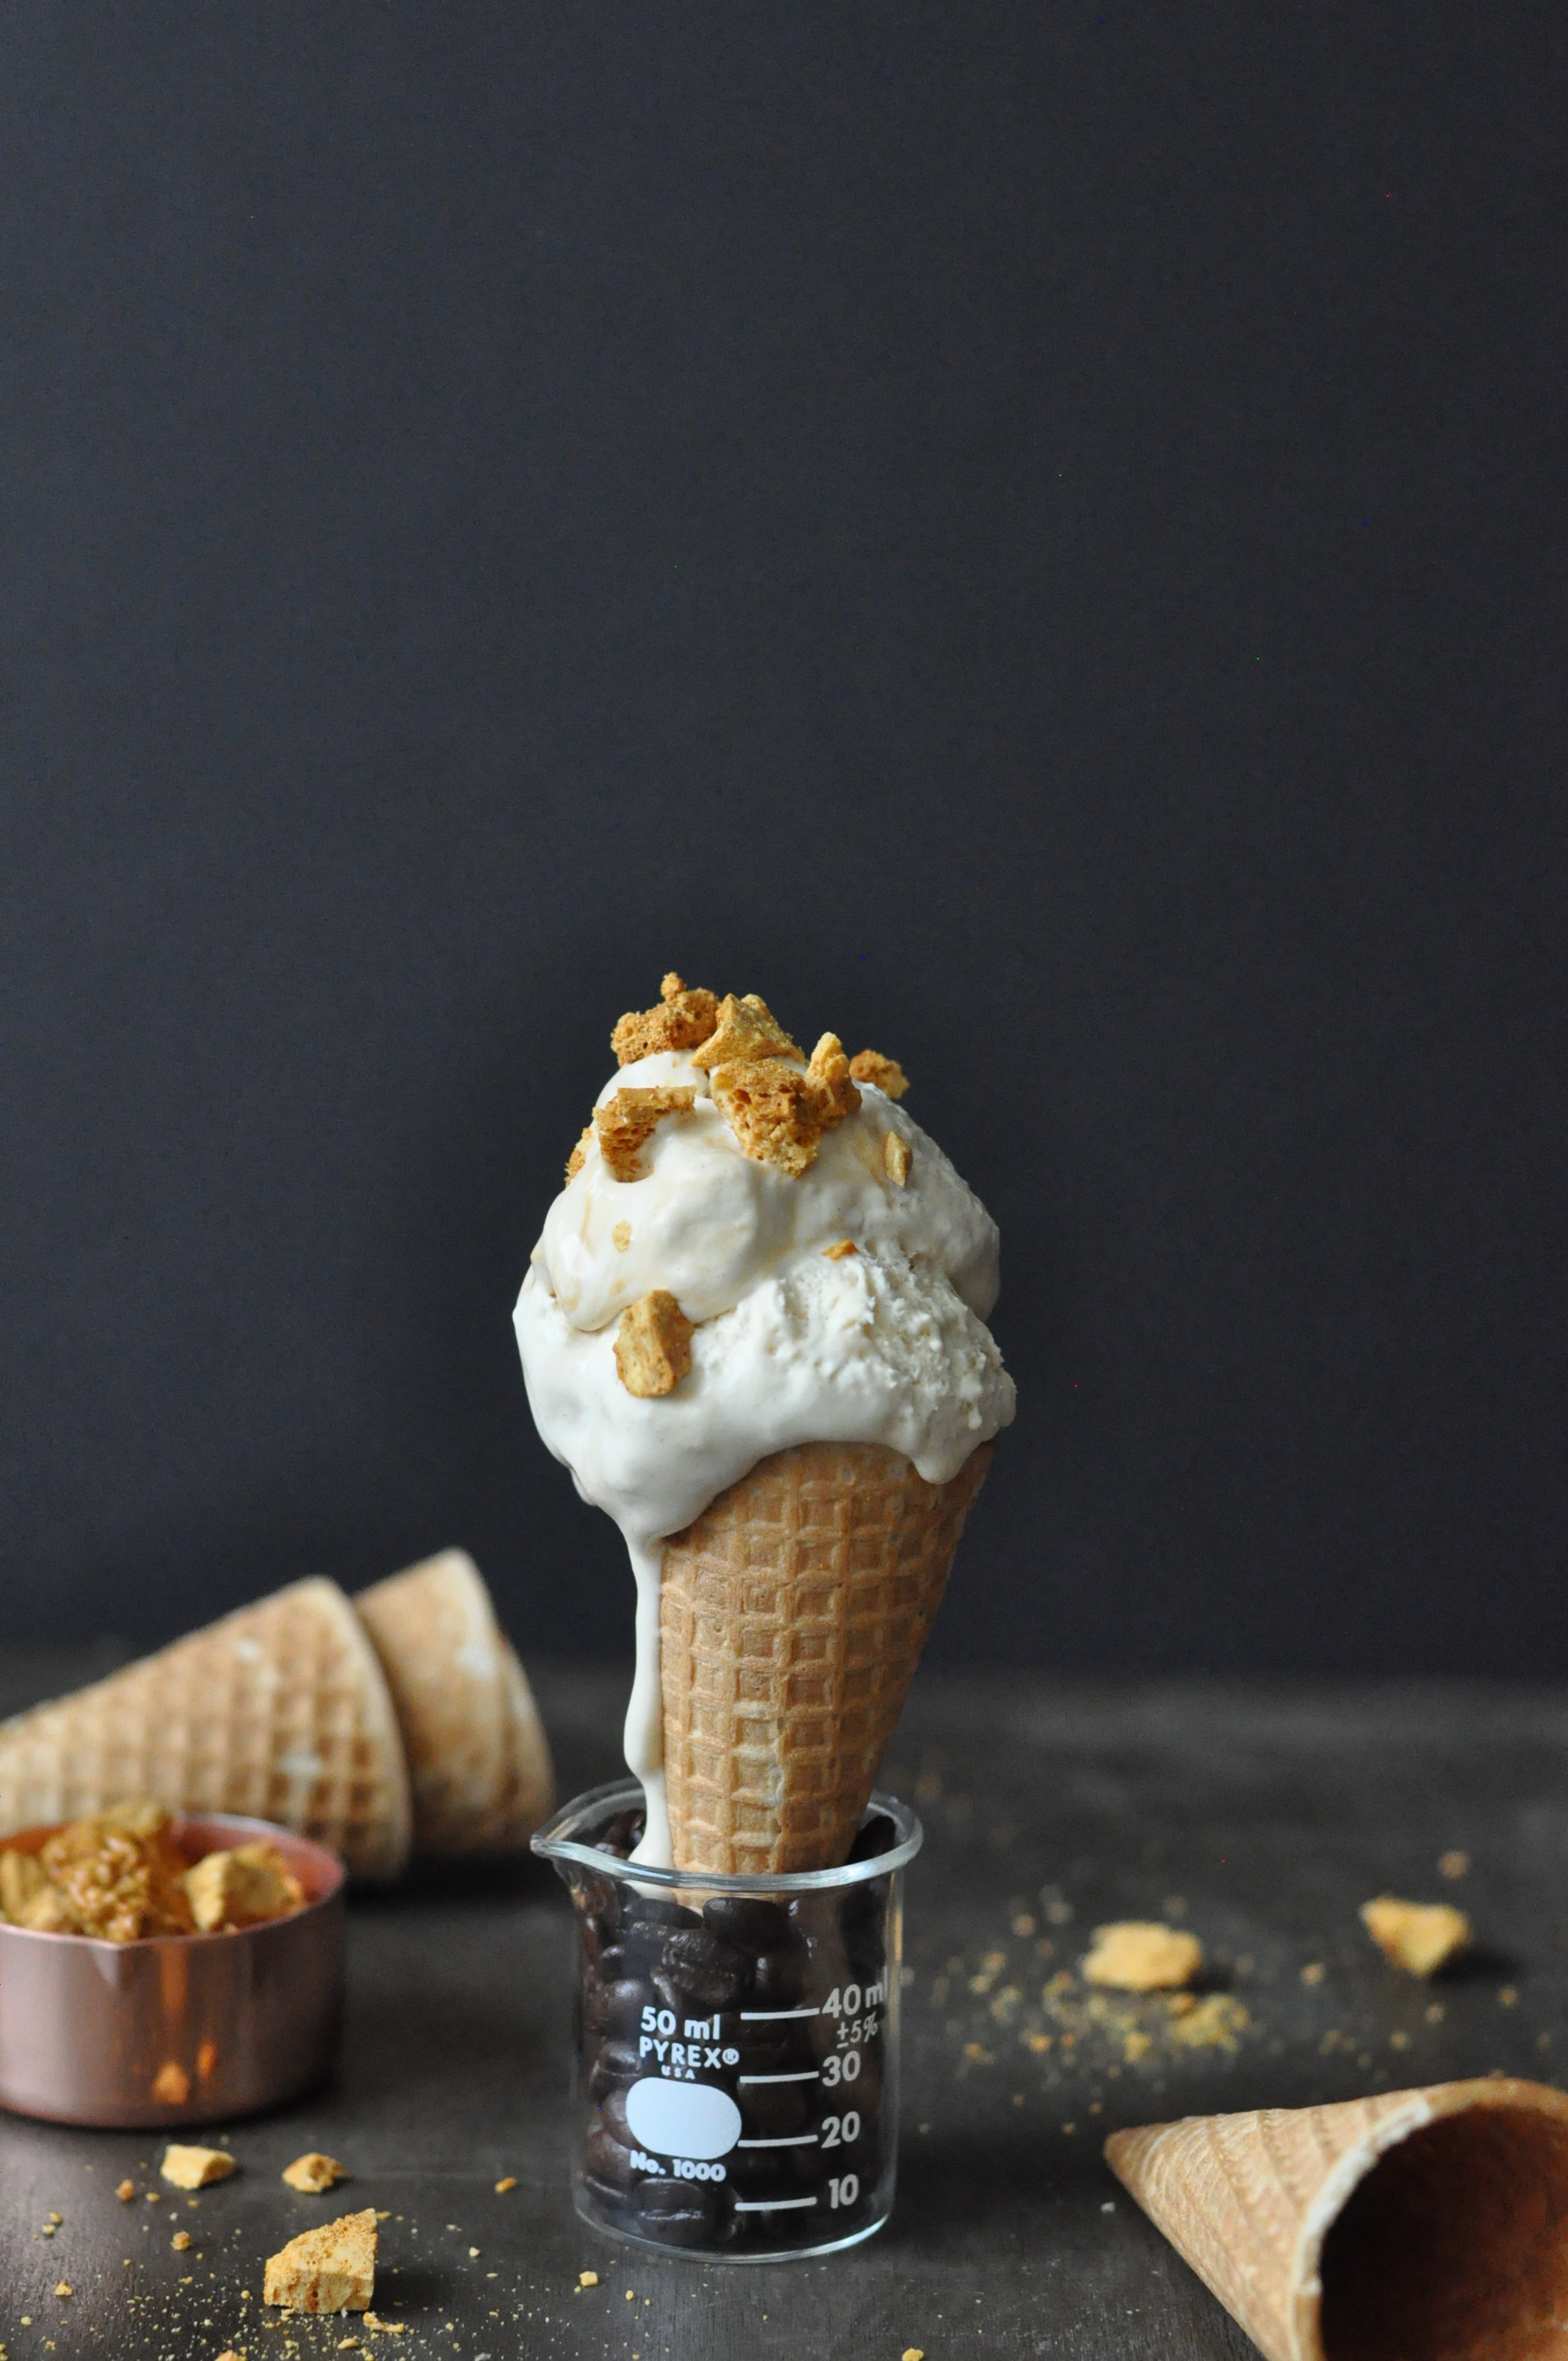
HK Milk Tea No-Churn Ice Cream with Coffee Honeycomb Crunchies
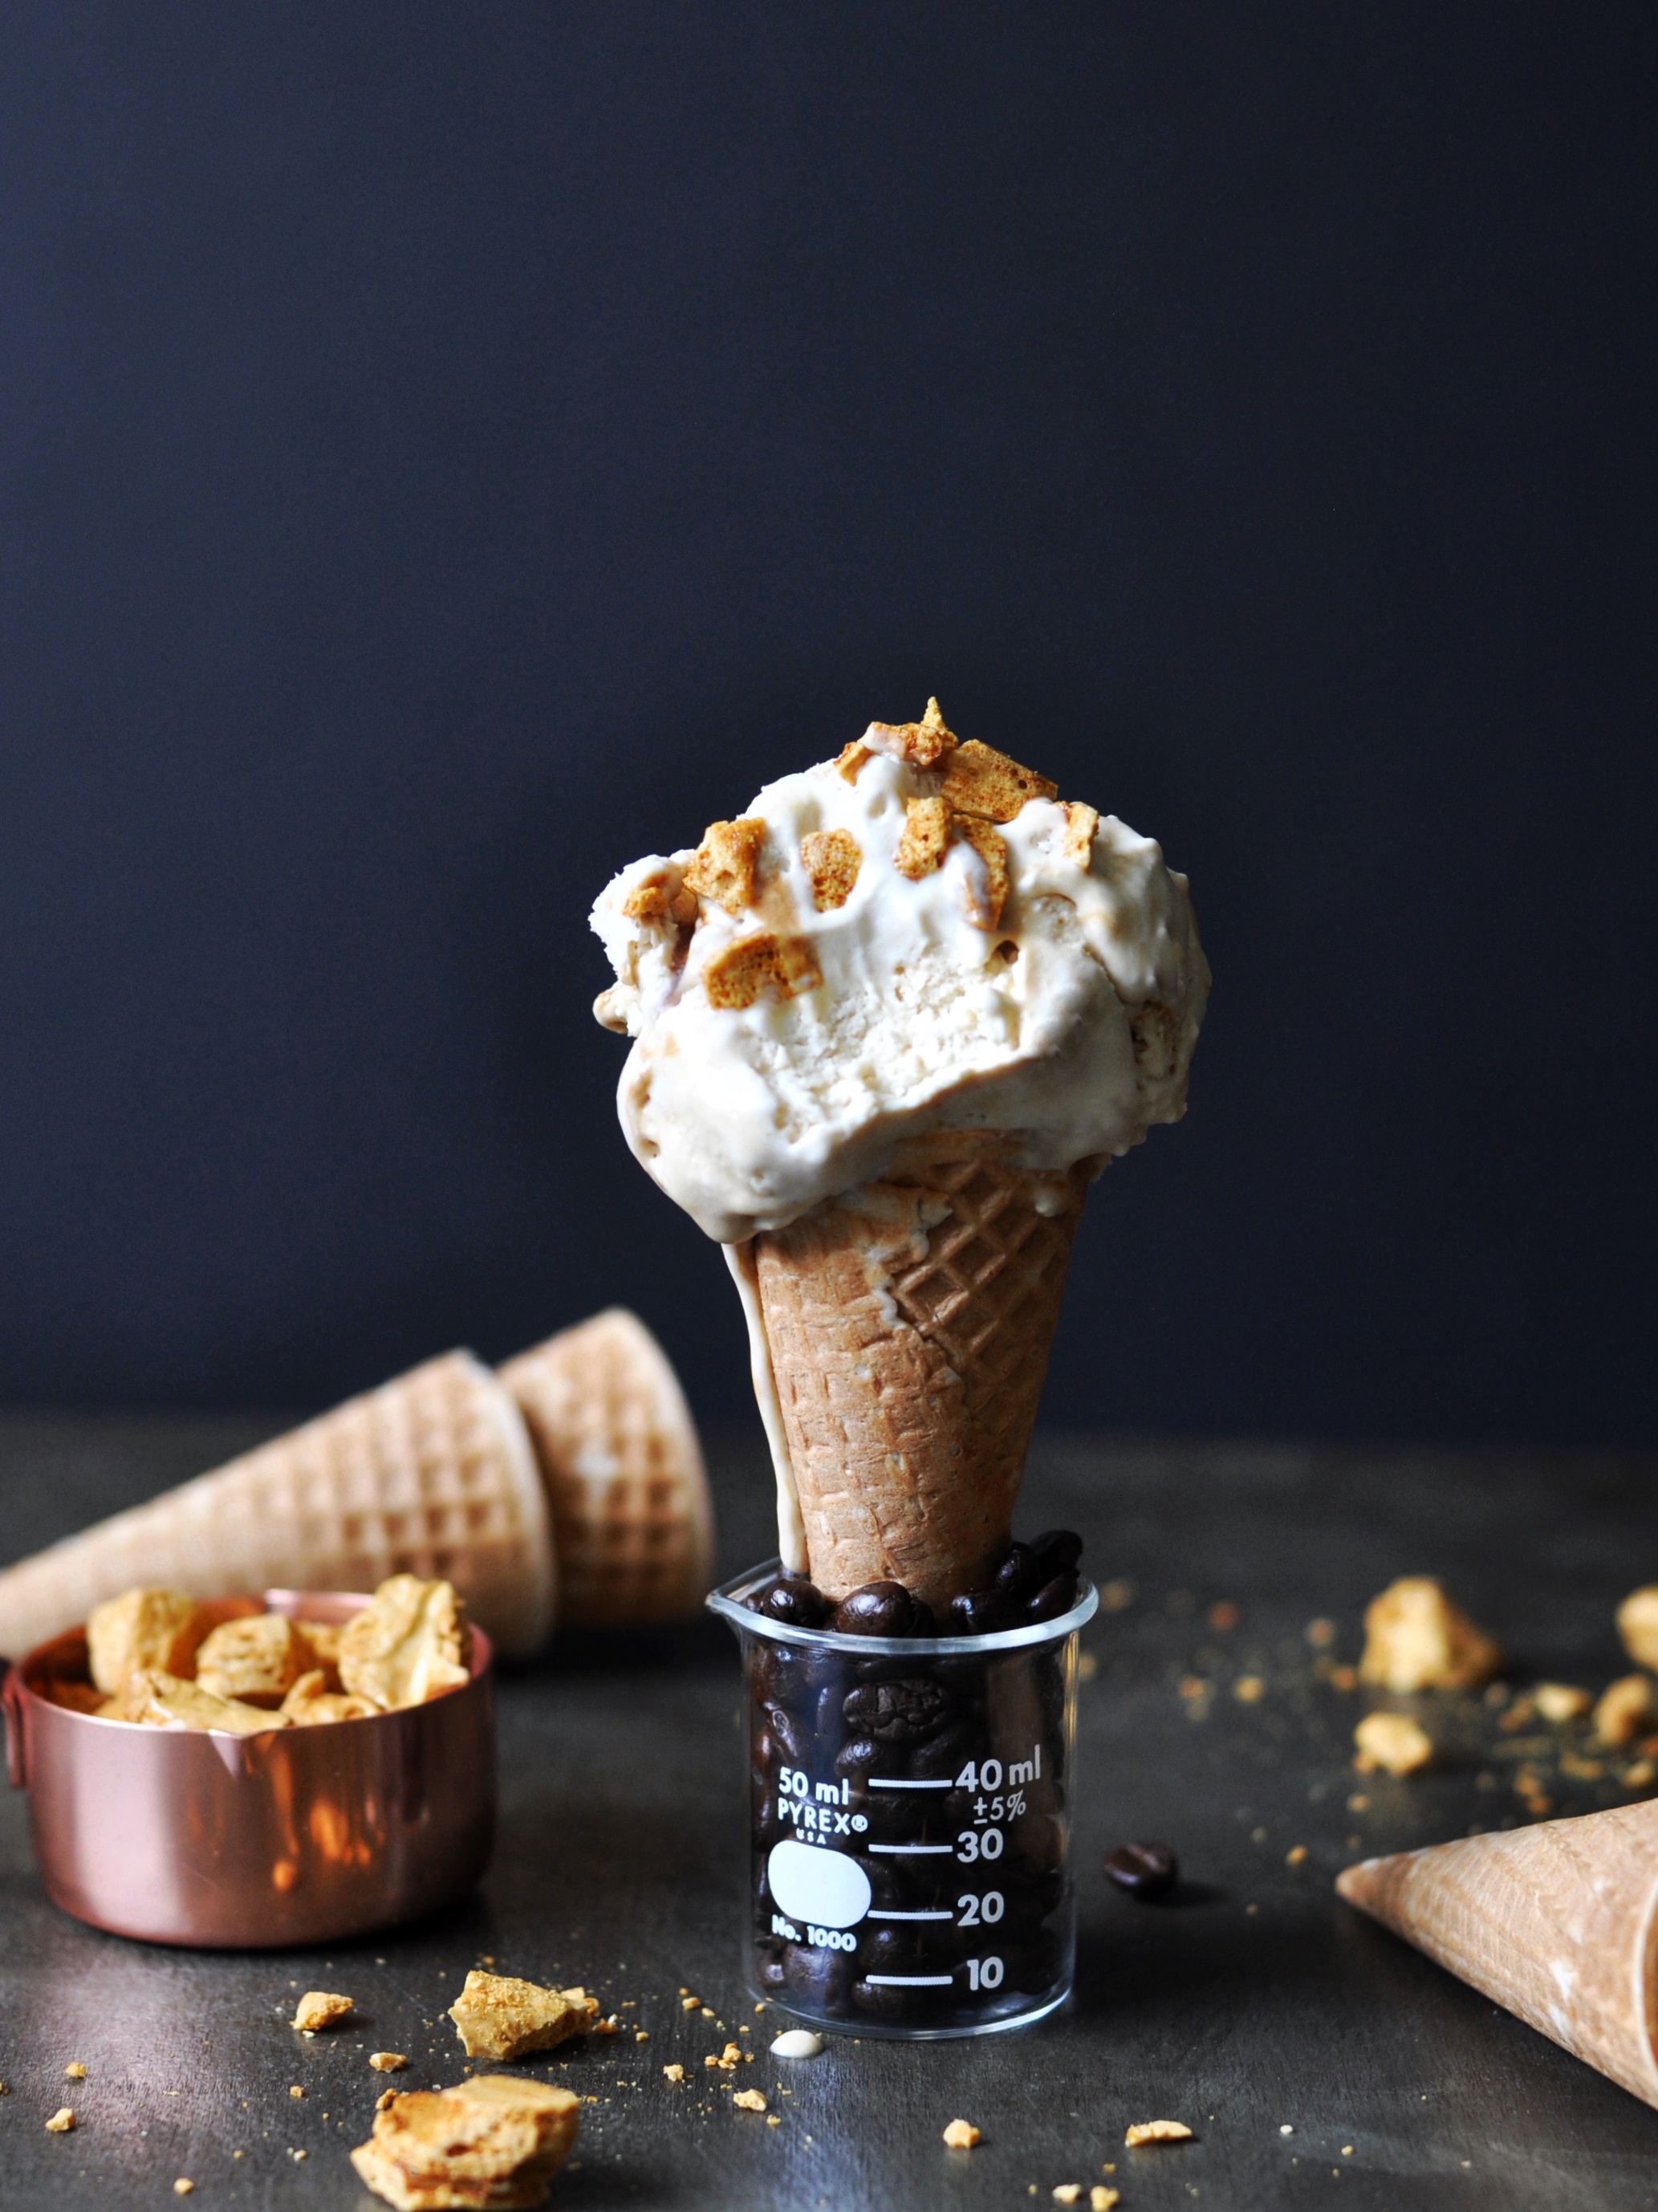


This recipe was loosely inspired by a popular beverage served in Hong Kong cafes which combines HK-style milk tea (strong brewed black Ceylon tea + evaporated or condensed milk) with a smaller amount of strong black coffee. It is called 'yuan yang' in Chinese - the name, a nod to the Chinese philosophy of balance & harmony or 'Yin Yang' i.e. the bitterness of coffee balances the creamy roundedness of the milk tea.
For this ice cream twist, I steeped Ceylon tea in the heavy cream and added a dash of instant coffee before whipping it up for the ice cream base. An additional coffee component comes from the coffee honeycomb bits.
This is my first no-churn ice cream. It really is so easy and accessible for anyone to make! I thoroughly enjoyed the subtle tea-infused flavor in this recipe. Admittedly I'm a huge tea lover so I pretty much adore any tea-infused creams or custards. Hey if you are a tea-lover like me or interested in achieving balance & harmony in your sweet life, you should try this recipe ;)
Recipe for the ice cream base adapted from The Kitchn's 'No Churn Ice Cream' recipe. Recipe for the Coffee honeycomb is within Serious Eats' recipe for 'Blum's Coffee Crunch Cake'. Makes about 1.5 quart or 6 C of ice cream.
Ingredients:
For the No-Churn Ice Cream
2 C (500 ml) heavy cream (aka whipping cream), preferably organic
2 tbsp or 5-6 tea bags of Ceylon tea leaves (or a quality English Breakfast, Orange Pekoe or other black tea)
3/4 tsp instant coffee granules (I used Mount Hagen organic instant coffee)
1 can of sweetened condensed milk (either 13 oz or 14 oz cans are both fine)
1 tsp pure vanilla extract
For the Coffee Honeycomb Crunchies
2 1/4 C (15.75 oz) granulated raw cane sugar
1/3 C (2.66 oz) strong brewed coffee or espresso
1/3 C (3.75 oz) light corn syrup
1 1/2 tbsp baking soda
Method:
To make the Coffee Honeycomb Crunchies
1. Attach a candy thermometer to the side of a 4- to 6-quart heavy pot. Add the sugar, coffee, and corn syrup to the pot and cook over medium-high heat, stirring occasionally with a heatproof silicone spatula until the mixture reaches 270f, about 10 minutes.
2. Meanwhile, heavily coat a 13-by-18-by-1-inch baking sheet with nonstick baking spray. Measure the baking soda into a cup and place near the stove, along with a large whisk.


3. When the crunch reaches 270f, increase the heat to high and stir constantly until the crunch reaches 305f. Remove from the heat and quickly whisk the baking soda into the crunch; the mixture will expand and aerate quickly, in a matter of seconds. Pour the crunch onto the baking sheet. Allow the crunch to cool, undisturbed, for at least 30 minutes.

4. Using a cleaver or other heavy knife, break the crunch into quarter-sized pieces. The crunch can be made ahead and stored in an airtight container at room temperature for up to 2 weeks. Reserve some of it to serve as a topping with the ice cream.

To make the No-Churn Ice Cream
5. For the ice cream base, gently heat the heavy cream in a small pot over medium heat. Do not boil it! When the cream is hot, remove from heat. Add your tea bags. If you are using loose leaf tea, use a tea infuser / tea ball. If you do not own a tea infuser, add the loose tea directly into the cream -- you will need to strain it later with a very fine mesh strainer. Next add the instant coffee. Give everything a few stirs and allow it to steep for 30 minutes. Remove the tea bags or tea infuser (or strain the tea leaves using a very fine mesh strainer). Refrigerate the mixture until it is cold again to enable whipping.

6. Meanwhile, in a separate large bowl, mix the vanilla extract into the condensed milk.

7. When the cream mixture is fridge-cold again, whip it in the bowl of a stand mixer (or by hand with a hand mixer) until stiff, billowy peaks, about 3 minutes.

8. Before folding all the whipped cream into the condensed milk mixture, gently mix just a small scoop of the whipped cream into the condensed milk. This lightens the condensed milk and makes it easier to fold into the rest of the whipped cream without deflating the cream.

9. Transfer the rest of the whipped cream to the bowl with the condensed milk, and gently fold it in. The mixture will smooth out and become soft and silky. Stop when you see just a few small lumps here and there — be careful not to deflate the mixture too much or over-mix.
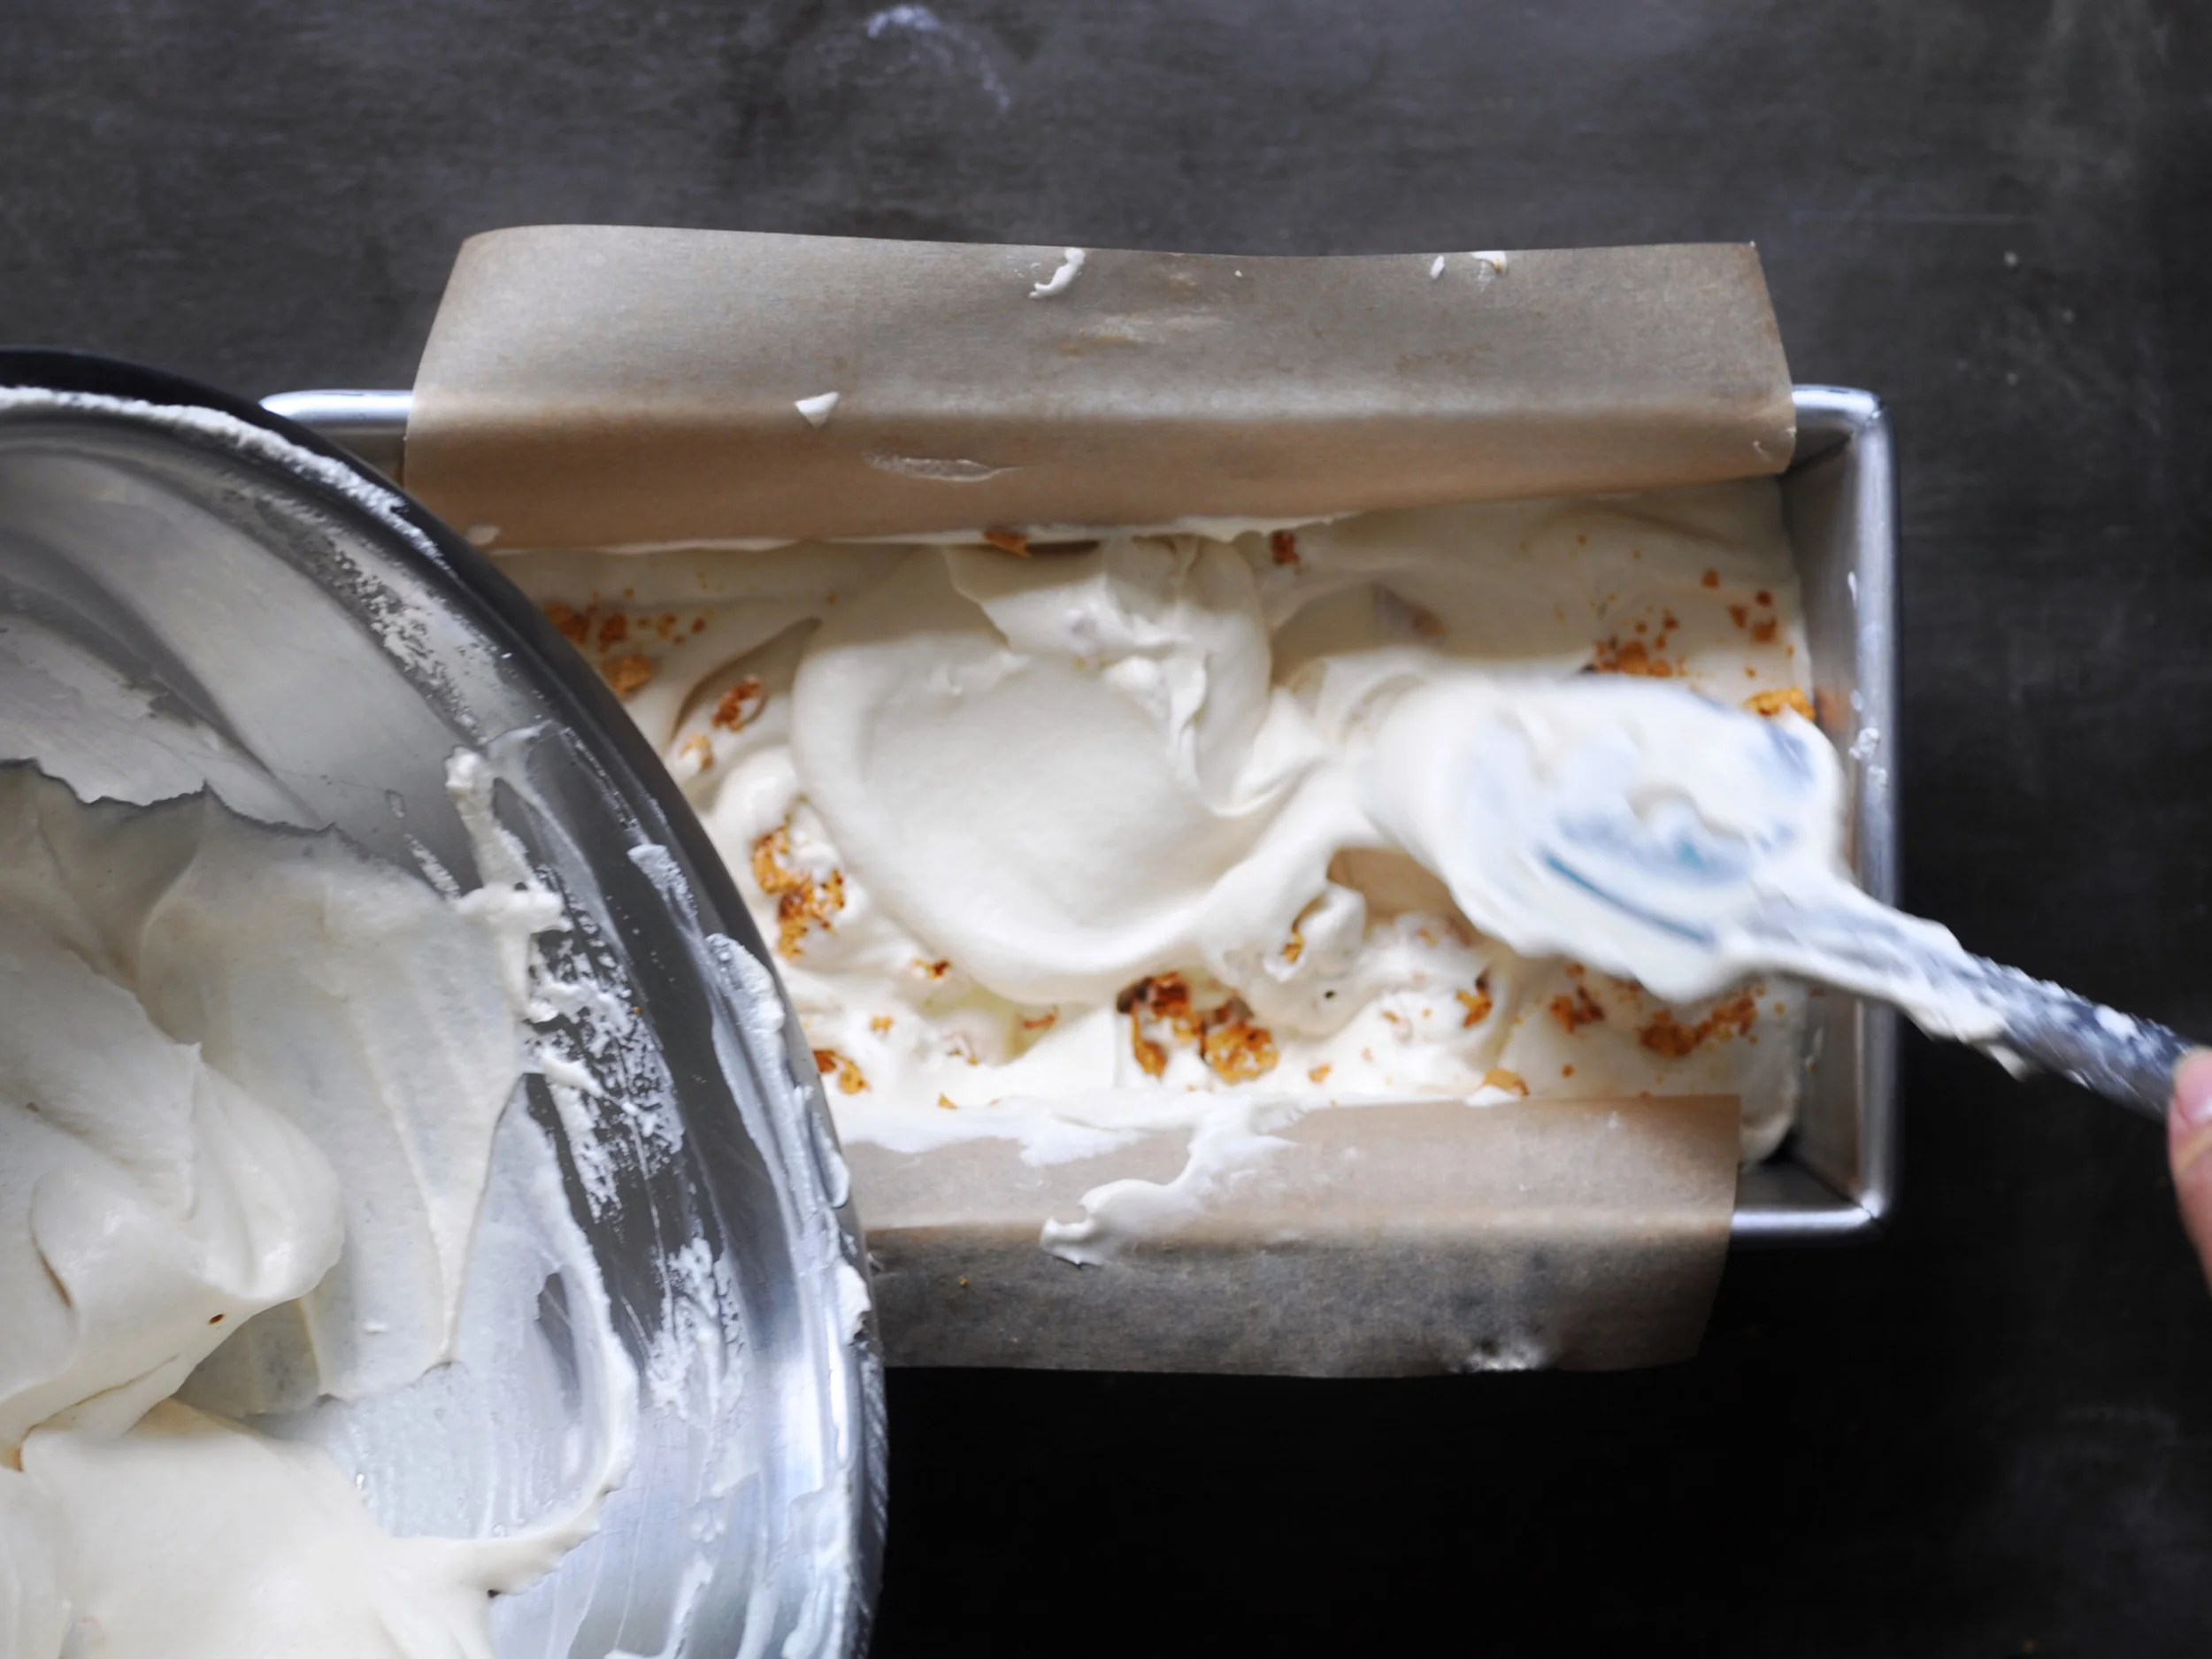
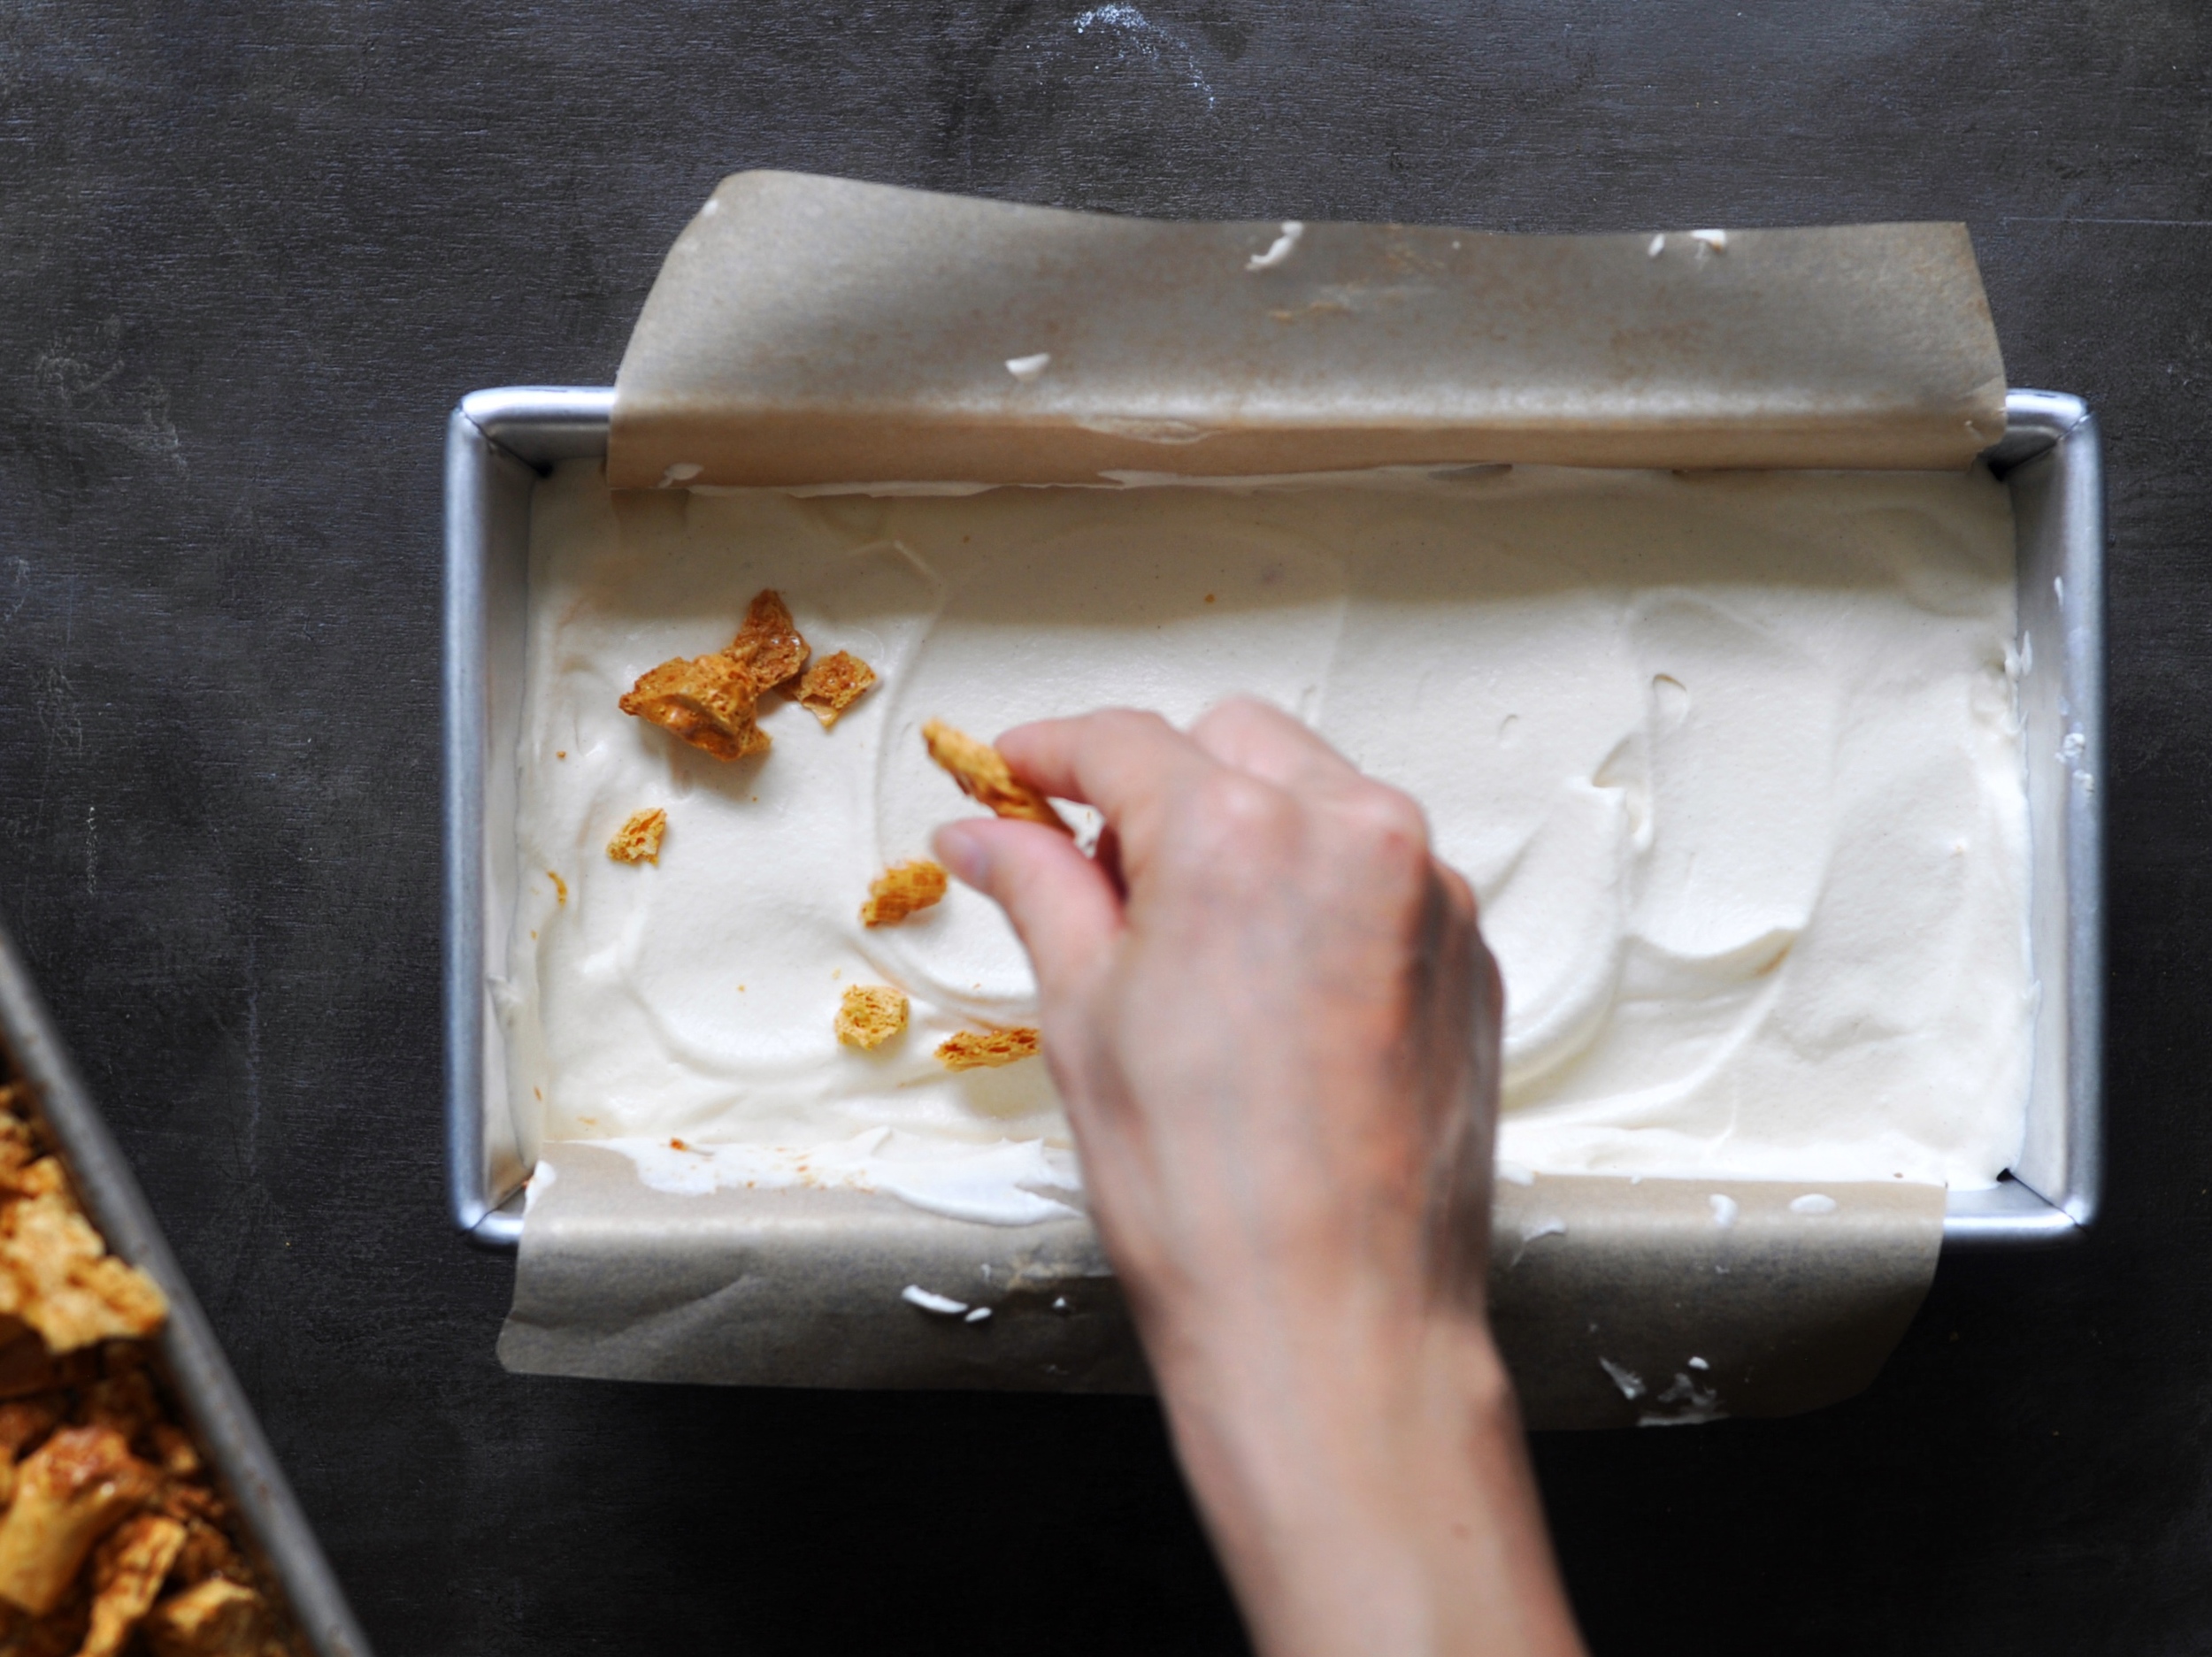
10. Layer the ice cream base and coffee honeycomb crunchies in a freezer-safe container. Use a spatula to first scrape half of the ice cream base into the container. Sprinkle with broken coffee honeycomb crunchies. Add remaining ice cream base on top and smooth out the top. Press a piece of parchment paper against the surface to prevent ice crystals from forming during freezing. Close airtight lid or wrap the container with plastic wrap. You may even want to put it into a zip top freezer bag for additional insulation.


11. Freeze for at least six hours, or up to 2 weeks. Serve with reserved coffee honeycomb crunchies sprinkled on top!
Enjoy! xx